Handling Forwarding Documents
You can set how the machine handles the documents to be forwarded.
|
IMPORTANT
|
|
This setting is available only when the Send function (optional) is activated or the optional Super G3 Fax Board-AG1 is attached to the machine.
|
|
NOTE
|
|
The default settings are as follows:
Print Image: On
Store Image to Memory: Do Not Store
When Print Image and Memory Lock are set to ‘Off’ and Store Image to Memory is set to ‘Do Not Store’, the received documents will be lost if a forwarding error occurs.
If Memory Lock is set to ‘On’, forwarded documents or those with forwarding errors are not printed even if Print Image is set to ‘On’ or ‘For Error Only’. They are printed when Memory Lock is set to ‘Off’.
When Print Image is set to ‘On’ or ‘For Error Only’, the first page of a document with forwarding errors will be printed on the Error TX Report if it is set to be printed with image in Report Settings, even if Memory Lock is set to ‘On’. For instructions on Report Settings, see Printing Communication Reports and Lists.
|
1
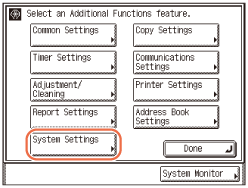
Press  (Additional Functions) → [System Settings].
 (Additional Functions) → [System Settings].
2
Press [ ] or[
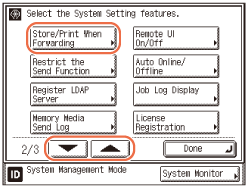
] or[  ] until [Store/Print When Forwarding] appears → press [Store/Print When Forwarding].
 ] or[
] or[  ] until [Store/Print When Forwarding] appears → press [Store/Print When Forwarding].
3
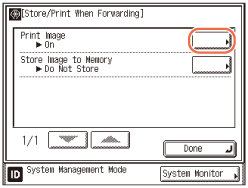
Press [Print Image].
4
Press [On], [For Error Only], or [Off] → [OK].
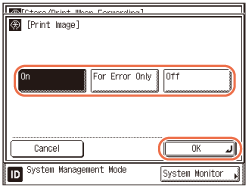
[On]: Print all the images that has been forwarded.
[For Error Only]: Prints the image only when forwarding has failed.
[Off]: Does not print the image.
5
Press [Store Image to Memory].
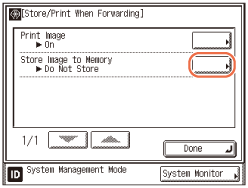
6
Press [For Error Only] or [Do Not Store] → [OK].
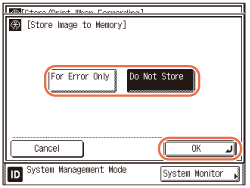
[For Error Only]: Stores the image in memory if forwarding fails.
[Do Not Store]: Does not store the image.
NOTE:
If you set Store Image to Memory to ‘For Error Only’, you can redirect the jobs with forwarding errors to destinations registered in the Address Book or one-touch buttons from the I-FAX Forwarding Error Status screen or Fax Forwarding Error Status screen. For help, see Checking / Changing the Status of Documents in Memory.
7
Press  (Reset) to return to the top screen.
 (Reset) to return to the top screen.