Checking / Changing the Status of Documents with Forwarding Errors
This section describes how to check the detailed information of documents that the machine failed to forward. You can also delete, print, and forward those documents.
|
NOTE
|
|
Jobs with forwarding errors are stored in memory only if Store Image to Memory in Store/Print When Forwarding is set to ‘For Error Only’. (Setting the Send Function)
|
I-Fax
Follow this procedure to check, delete, print, and forward I-fax documents with forwarding errors.
1
Press [System Monitor] → [RX/TX].
For help, see steps 1 and 2 in E-Mail/I-Fax/File Server.
2
Press [RX Job Report] → [I-Fax Mem. Lock Doc.].
For help, see steps 2 and 3 in I-Fax.
3
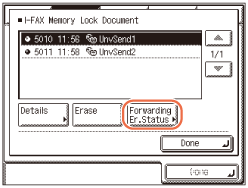
Press [Forwarding Er.Status].
4
Select the job whose detailed information you want to check → press [Details].
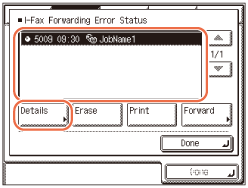
If the job that you want to select is not displayed, press [ ] or [
 ] to scroll to the job.
 ] or [
 ] to scroll to the job.
5
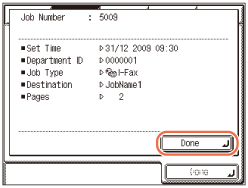
Check the details of the selected job → press [Done].
If you want to delete the selected job:
|
1
|
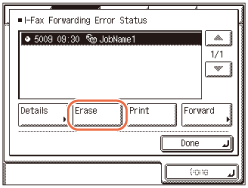
Press [Erase].
 |
|
2
|
Press [Yes].
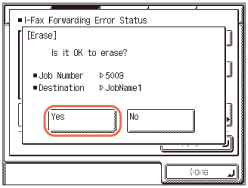 The message <Erasing...> appears for approximately two seconds on the touch panel display.
The selected job is deleted.
|
If you want to print the selected job:
|
1
|
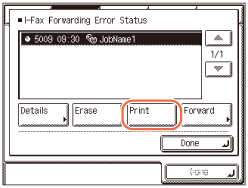
Press [Print].
 |
|
2
|
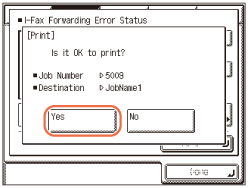
Press [Yes].
 |
If you want to forward the selected job:
|
1
|
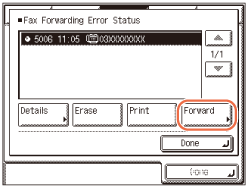
Press [Forward].
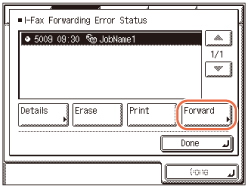 IMPORTANT:
If you are logged out of Authorized Send, [Forward] is not available.
|
|
2
|
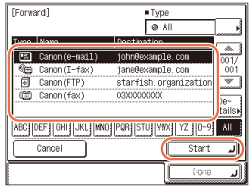
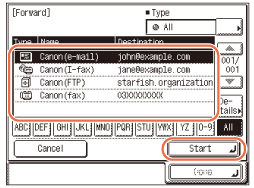
Select the forwarding destination from the Address Book → press [Start].
 NOTE:
For instructions on how to use the Address Book, see Using the Address Book.
If the transfer is successful, the document is deleted from memory.
You cannot select a group address.
The destinations you can specify may vary depending on the settings under <Send Restriction Settings>. (Customizing Settings) For example, if E-mail Send is set to ‘Do not allow’ or ‘Only allow sending to own address’, e-mail addresses and I-fax addresses are not displayed in the Address Book list.
|
6
Press  (Reset) to return to the top screen.
 (Reset) to return to the top screen.
Fax
Follow this procedure to check, delete, print, and forward fax documents with forwarding errors.
1
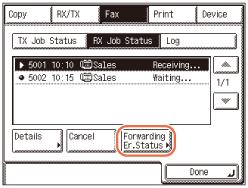
Press [System Monitor] → [Fax] → [RX Job Status].
For help, see steps 1 and 2 in Checking/Deleting Fax Documents Being Received or Waiting To Be Printed.
2
Press [Forwarding Er.Status].
3
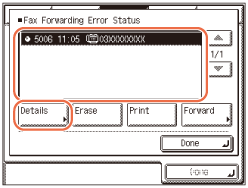
Select the job whose detailed information you want to check → press [Details].
If the job that you want to select is not displayed, press [ ] or [
 ] to scroll to the job.
 ] or [
 ] to scroll to the job.
4
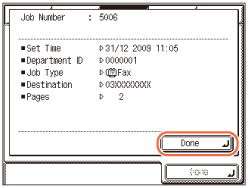
Check the details of the selected job → press [Done].
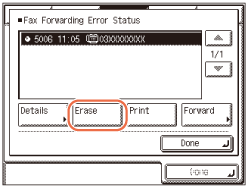
If you want to delete the selected job:
|
1
|
Press [Erase].
 |
|
2
|
Press [Yes].
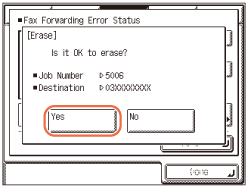 The message <Erasing...> appears for approximately two seconds on the touch panel display.
The selected job is deleted.
|
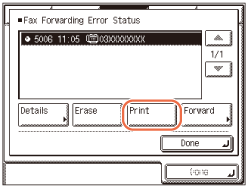
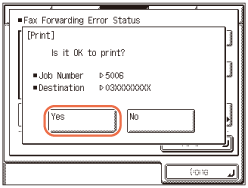
If you want to print the selected job:
|
1
|
Press [Print].
 |
|
2
|
Press [Yes].
 |
If you want to forward the selected job:
|
1
|
Press [Forward].
 IMPORTANT:
If you are logged out of Authorized Send, [Forward] is not available.
|
|
2
|
Select the forwarding destination from the Address Book → press [Start].
 NOTE:
For instructions on how to use the Address Book, see Using the Address Book.
If the transfer is successful, the document is deleted from memory.
You cannot select a group address.
The destinations you can specify may vary depending on the settings under <Send Restriction Settings>. (Customizing Settings) For example, if E-mail Send is set to ‘Do not allow’ or ‘Only allow sending to own address’, e-mail addresses and I-fax addresses are not displayed in the Address Book list.
|
5
Press  (Reset) to return to the top screen.
 (Reset) to return to the top screen.