Sending a Fax
This section describes the basic operation procedure for sending a fax.
† The Fax function is available only when the optional Super G3 Fax Board-AG1 is attached to the machine.
†† Even when the above option is attached, using the Fax function can be restricted by the settings of Authorized Send. See Customizing Settings.
1
Display the Send Screen
Press  (SEND) to display the top screen of the Send and Fax functions.
(SEND) to display the top screen of the Send and Fax functions.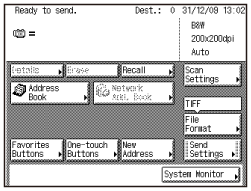
If the machine is in the Sleep mode, press  (Power).
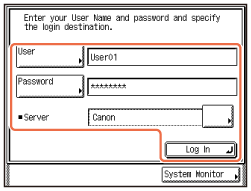
(Power).Enter your ID and password or insert the control card if the screen prompts you to do so. For more information on logging in to the machine, see How to Log in to the Machine.
If the screen shown below appears, enter your user name and password and specify the login destination → press [LogIn].
2
Place Your Originals
Place your originals in the feeder or on the platen glass.
7-1.gif)
Close the feeder/platen cover after placing your originals on the platen glass.
3
Enter the Fax Number
Enter the fax number using  –
– (numeric keys).
–(numeric keys).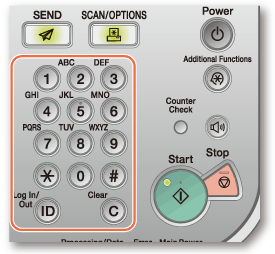
You can also specify the destination by using [Address Book], [Favorites Buttons], or [One-touch Buttons]. These functions save you the effort of entering a fax number each time you send documents.
For information on specifying destinations, see Specifying Destinations Easily and Quickly.
4
Start Sending
Press  (Start).
(Start).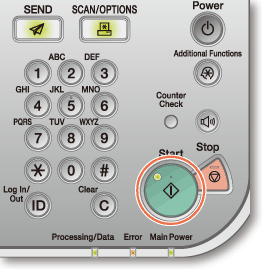
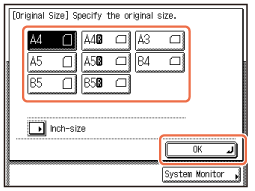
When the screen below appears, select the original size → press [OK].
To cancel scanning originals, press  (Stop). You can also cancel scanning originals by pressing [Cancel] on the screen indicating the fax processing status.
(Stop). You can also cancel scanning originals by pressing [Cancel] on the screen indicating the fax processing status.For instructions on how to cancel sending a document during transmission, see Sending Documents.