Job Recall
You can recall the last three destinations, scan settings, and send settings which have been set, and then send your documents.
|
IMPORTANT
|
|
The specified destinations, scan settings, and send settings are stored in memory when:
The control panel power switch is pressed
 (Start) is pressed (Start) is pressed (Reset) is pressed (Reset) is pressedThe Auto Clear mode activates
The Standard mode is not stored in Recall memory.
|
|
NOTE
|
|
The three most recent settings stored in memory are not deleted when the power is turned OFF.
|
1
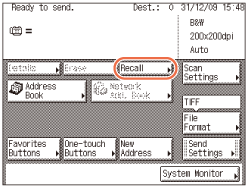
Press  (SEND) → [Recall].
 (SEND) → [Recall].
NOTE:
If Restrict Recall in Restrict the Send Function is set to ‘On’, [Recall] is not displayed. (Setting the Send Function)
2
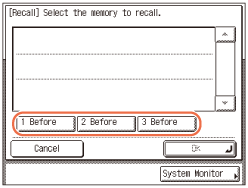
Press [1 Before], [2 Before], or [3 Before].

NOTE:
The destinations you can specify may vary depending on the settings under <Send Restriction Settings>. (Customizing Settings) For example, if E-mail Send is set to ‘Do not allow’ or ‘Only allow sending to own address’, the buttons containing e-mail addresses or I-fax addresses are not displayed.
3
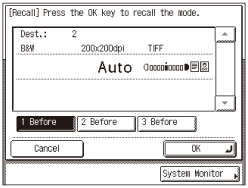
Confirm the settings.

If there are more settings than are currently displayed, you can scroll the screen by pressing [ ] or [
 ].
].
 ] or [
 ].
].4
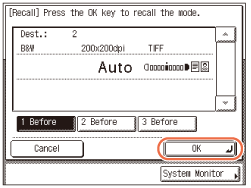
Press [OK].

The display returns to the top screen.
NOTE:
You can manually change the recalled settings and destinations before you send your documents.
To cancel the recalled settings and destinations, press  (Reset).
 (Reset).
If multiple destinations are stored in memory, the destinations may not be listed in the order in which they were set.
5
Press  (Start) to send documents.
 (Start) to send documents.
NOTE:
If the settings under <Authentication Method> in <SMTP Authentication Settings> are configured to display an authentication screen, the Enter Network Password screen appears when you press  (Start) to send e-mails or I-faxes. (Customizing Settings) Specify the user name and password → press [OK].
 (Start) to send e-mails or I-faxes. (Customizing Settings) Specify the user name and password → press [OK].
If the settings under <When Sending File to Address Registered in Address Book> are configured to display an authentication screen, the Enter Network Password screen appears when you press  (Start) to send documents to a file server. (Customizing Settings) Specify the user name and password → press [OK].
 (Start) to send documents to a file server. (Customizing Settings) Specify the user name and password → press [OK].