Replacing the Stamp Ink Cartridge
When you send or fax documents, originals fed into the feeder can be stamped to indicate that they have been scanned already. If you notice that this mark is faint or no longer visible, replace the stamp ink cartridge as described below.
|
IMPORTANT
|
|
When replacing the stamp ink cartridge, take care not to allow ink to come into contact with your hands or clothing. If ink gets onto your hands or clothing, wash it off immediately with cold water.
The Stamp mode is available only when the optional Stamp Unit-B1 is attached to the feeder (optional for the imageRUNNER 2545/2535/2530/2525/2520).
|
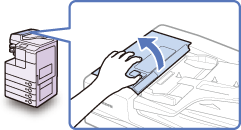
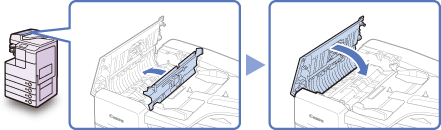
1
Open the feeder cover.
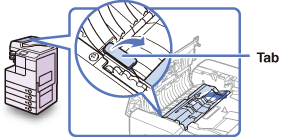
2
Open the inner cover, holding it by the front tab.
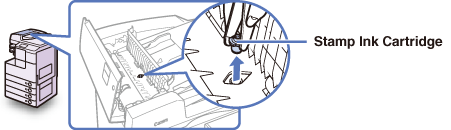
3
Remove the old stamp ink cartridge using tweezers.
4
Attach the new stamp ink cartridge using tweezers.
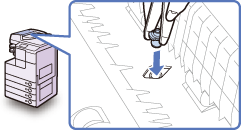
Make sure that the cartridge clicks into place, not protruding from the surface.
|
IMPORTANT
|
|
Insert the stamp ink cartridge properly, or originals may be jammed in the feeder.
|
5
Close the inner cover, and then the feeder cover.
 |
|
When closing the covers, be careful not to get your fingers caught, as this may result in personal injury.
|