Editing the LDAP Server Settings
You can manage the LDAP server settings.
|
IMPORTANT
|
|
Specifying the LDAP server settings is available only when the Remote UI is in the System Manager Mode.
|
|
NOTE
|
|
For instructions on how to edit the LDAP server settings on the machine’s control panel, see Setting up the Machine for Your Network Environment.
|
1
Click [Add.Func.] → [Register LDAP Server] in the [Add.Func.] menu.
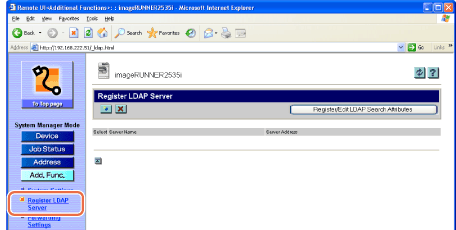
The Register LDAP Server page is displayed.
2
Edit the LDAP server settings.
To register a new LDAP server:
|
1
|
Click [
The Register LDAP Server (or Register LDAP Search Server) page is displayed.
|
|
2
|
Specify the necessary settings → click [OK].
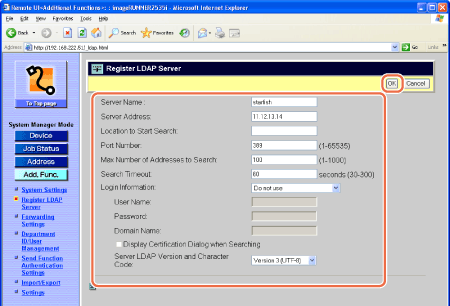 NOTE:
For information on the settings, see Setting up the Machine for Your Network Environment.
If Authorized Send is activated, <Authentication Method> appears on this page. Specify whether to carry over the login information (user name and password) from Authorized Send to the authentication information used when users search for e-mail addresses and fax numbers via the LDAP server. To use the same user name and password for LDAP search authentication, select [Assume the same authentication information as when operation to send was started]. If not, select [Use device-specific authentication information].
|
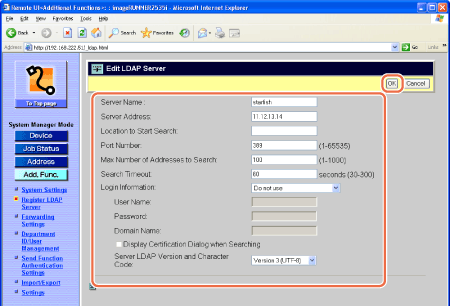
To edit the LDAP server:
|
1
|
Click the LDAP server name you want to edit on the page shown in step 1.
The Edit LDAP Server (or Edit LDAP Search Server) page is displayed.
|
|
2
|
Edit the settings as necessary → click [OK].
 |
To delete the LDAP server:
|
1
|
On the page shown in step 1, click [
The selected LDAP server is deleted.
|
To register or edit the LDAP search attributes:
|
1
|
Click [Register/Edit LDAP Search Attributes] on the page shown in step 1.
The Register/Edit LDAP Search Attributes page is displayed.
|
|
2
|
Specify or edit the necessary settings → click [OK].
 NOTE:
For information on the settings, see Setting up the Machine for Your Network Environment.
|