Different Size Originals
This mode enables you to scan different size originals with the same widths (A3 and A4, or B4 and B5, etc.) or different widths (A3 and B4, A4 and B5, etc.) together.
As an example, the procedure for selecting a mail box as the storage location is explained in this section.
|
IMPORTANT
|
|
Take note of the following when the originals with different widths are placed in the feeder:
Set your originals against the back edge of the feeder.
Use the following combinations of originals. Setting other combinations may result in damage to your originals.
A3 and B4, B4 and A4R, A4 and B5, B5R and A5R
The image may be distorted diagonally when scanned.
|
1.
Press [Scan and Store] → [Mail Box].
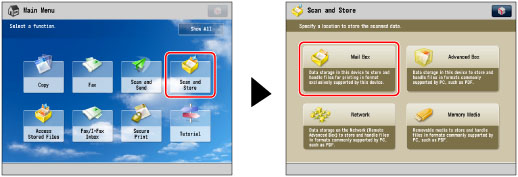
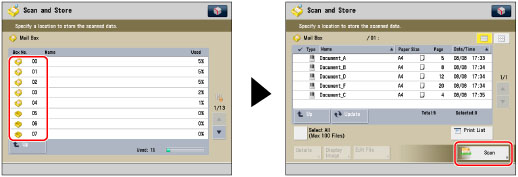
2.
Select the desired Mail Box → press [Scan].
3.
Press [Options] → [Different Size Originals].
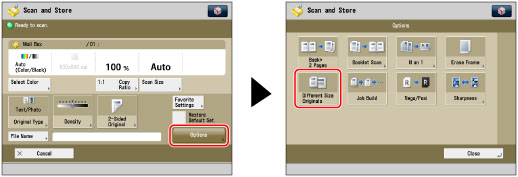
4.
Select the type of originals → press [OK] → [Close].
|
[Same Width]:
|
Press this key if you are placing originals with the same width.
|
|
[Different Width]:
|
Press this key if you are placing originals with different widths.
|
|
IMPORTANT
|
|
For information on the modes which cannot be set in combination with this mode, see "Unavailable Combination of Functions."
If you set the Scan Size setting to anything other than [Auto], all of the originals are scanned in the specified size. If you want to scan each original in its original size, make sure to set the Scan Size to [Auto].
If the originals are placed in the feeder, make sure that the different size originals are of the same weight (paper type).
If you set the Different Size Originals mode, the scanning speed may be slower than normal.
|