Gutter
This mode enables you to make prints with the entire image shifted by a designated width to the left, right, top, or bottom in order to create a gutter on the prints. Use this mode to make prints ready for placement in ring binders.
Left Margin Selected |  | Right Margin Selected |  | Top Margin Selected |  | Bottom Margin Selected | |
 |  |  |  |  |
IMPORTANT |
This mode can be used only for printing a file stored in a mail box. |
1.
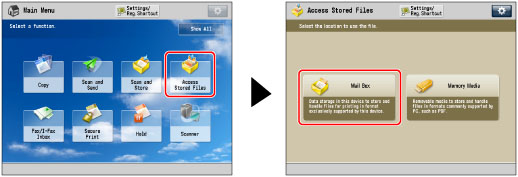
Press  (Main Menu) → [Access Stored Files] → [Mail Box].
 (Main Menu) → [Access Stored Files] → [Mail Box].
2.
Select the desired Mail Box → select the desired file → press [Print].

3.
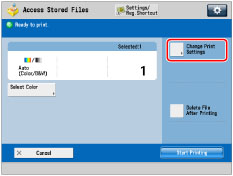
Press [Change Print Settings].

4.
Press [Options] → [Gutter].

To change the paper source, see "Paper Selection."
5.
Select the gutter position.

6.
Press [Front Side] or [Back Side] → press [-] or [+] to set the gutter width → press [OK].
Press [-] or [+] to set the gutter width.
NOTE | ||||
If you are using the Gutter and 2-Sided Printing modes together and printing a file that already has a gutter, set the Gutter mode for the back only. If you are using the Gutter and 2-Sided Printing modes together and printing a file that does not have a gutter, set the Gutter mode for both the front and back. If you enter a value other than 0, you can switch between positive and negative gutter width by pressing [±].
|
7.
Press [Close].