Relocating the Machine
|
See "Attention (Relocating the Machine)" in advance.
|
When changing the location of the machine or moving the machine for maintenance, be sure to perform the following procedure.
1
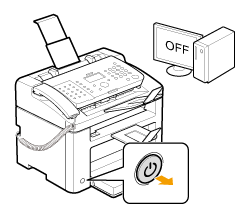
Turn OFF the machine and any connected computer.
2
Disconnect all cables and the power cord from the machine.
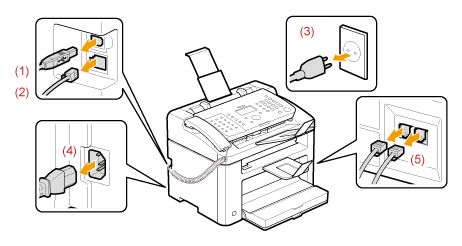
How to remove the cables and cord:
|
USB cable*
|
|
||||
|
Handset cable*
|
|
||||
|
Power cord
|
|
||||
|
Telephone cables*
|
|
* Whether the cable is connected or not varies depending on your environment.
3
Push the document feeder tray into the machine.

|
NOTE
|
If documents are set on the document feeder tray:Remove all documents from the document feeder tray.
|
4
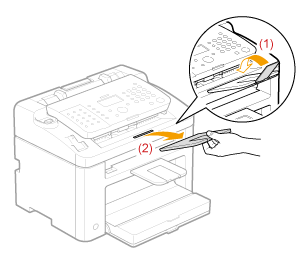
Fold the document stopper, and then remove the document return tray from the machine.
|
NOTE
|
If documents are set on the document return tray:Remove all documents from the document return tray.
|
5
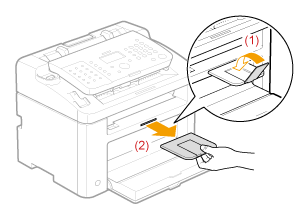
Fold the paper stopper, and then remove the output tray from the machine.
|
NOTE
|
If paper is in the output tray:Remove the paper from the output tray.
|
6
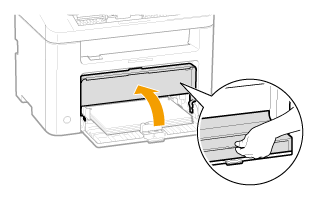
Lift the dust cover.
7
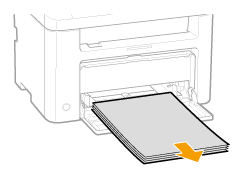
Remove any paper from the paper cassette.
|
NOTE
|
If the paper guide at the front projects from the paper cassette:Push the paper guide into the paper cassette.
|
8
Lower the dust cover.
9
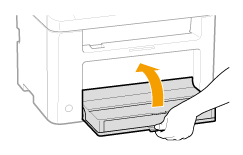
Close the paper cassette.
10
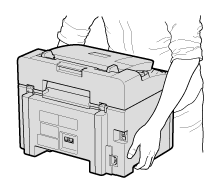
Move the machine.
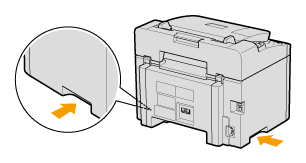
Make sure that all covers and trays are closed or removed, and hold the lift handles with the front side of the machine facing you.
Check the weight of the machine to carry it safely.

11
Carefully set the machine down on the new installation site.
|
NOTE
|
When reinstalling the machine:See the supplied Starter Guide.
|
When Transporting the Machine to a Long Distance
To prevent damage to the machine during transportation, refer to the following:
Remove the toner cartridge.
 |
See also "Storing Toner Cartridges."
|
Securely pack the printer in its original box with the original packing materials.
 |
If the original box and packing materials are not available, find an appropriate box along with packing materials and pack the machine and the parts appropriately.
|