
Installing the ROM
|
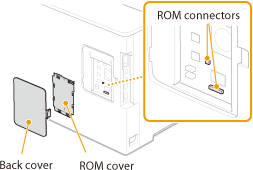
This section describes how to install the optional ROM in the machine. The ROM is used connected to the ROM connectors inside the back cover of the machine. Read the precautions in Installation before installing the ROM.
|
 |
 |
Precautions when installing the ROMDo not cause any metal such as screws to come into contact with the circuit boards in the machine. Doing so may result in damage to the machine.
Do not touch the internal parts, printed wiring, connectors, or switches. Doing so may result in damage to the machine.
Do not turn ON the power when the ROM cover is open. Doing so may result in damage to the machine.
Precautions for avoiding static electricityThe ROM contains parts that are sensitive to static electricity. Observe the following precautions for preventing the ROM from being damaged by static electricity.
Touch a metal portion in the room to discharge static electricity from your body before handling the ROM.
Do not touch any item that is likely to generate static electricity, such as a display, during work.
To avoid the influence of static electricity, do not remove the ROM from the protective case until just before connecting it to the ROM connectors.
|
1
Turn OFF the machine, and unplug the power plug from the AC power outlet.

When you turn OFF the power, shut down the machine from the operation panel without using the power switch. Turning OFF the Power (Performing a Shutdown)
2
Remove the back cover.
|
1
|
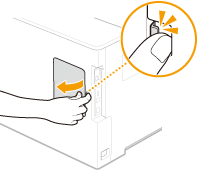
While pushing the catch, slightly open the cover toward you.
 |
|
2
|
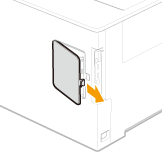
Remove the right cover in the direction indicated by the arrow.
 |
3
Remove the ROM cover.
|
1
|
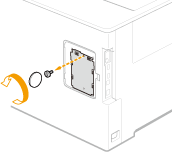
Use a coin to remove the screws.
 |
|
2
|
Open the ROM cover, and remove it in the direction indicated by the arrow.
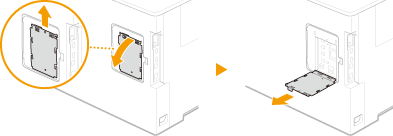 |
4
Install the ROM.
While aligning the ROM with the two ROM connectors of the machine, securely push it until it stops.
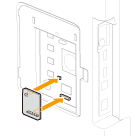

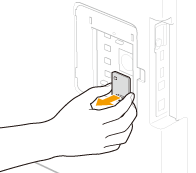
When disconnecting the ROM
Hold the edges of the ROM and pull it out as shown in the illustration below.
5
Put the ROM cover back into position.
|
1
|
Close the ROM cover by pushing in the catch of the ROM cover in the direction indicated by the arrow.
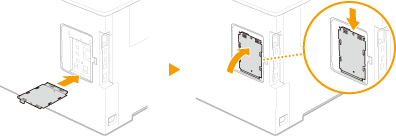 |
|
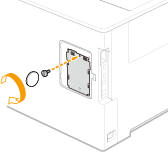
2
|
Use a coin to reattach the screws.
 |
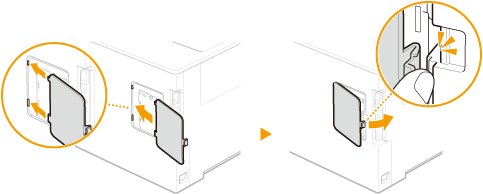
6
Insert the back cover in the direction indicated by the arrow, and close it while pushing the catch.
 |
|
When you want to install an SD card at the same time, proceed to Installing an SD Card.
|
Checking that Barcode Printing Kit-F1 Is Properly Installed
|
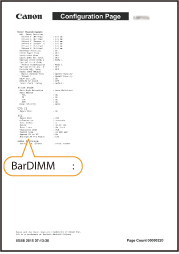
Print the Configuration Page, and confirm that "BarDIMM" is displayed in "PCL."
If "BarDIMM" is displayed, the ROM is properly installed.  If "BarDIMM" is not displayed
The ROM is not installed properly. Remove the ROM from the machine, and reconnect it.
|
 |