
Configuring SMB
Server Message Block (SMB) is a protocol for sharing resources, such as files and printers, with more than one device in a network and used to register the machine as a shared printer on the SMB network.
 |
|
SMB supports only NetBIOS over TCP/IP and does not support NetBEUI. Configure the IP address before configuring the SMB settings. Setting IP Addresses
SMB is enabled only when the optional SD card is installed in the machine.
|
1
Start the Remote UI and log on in Management Mode. Starting Remote UI
2
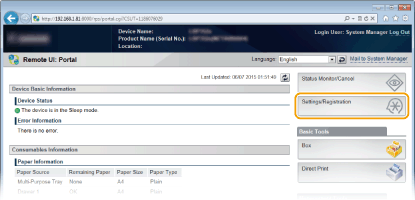
Click [Settings/Registration].
3
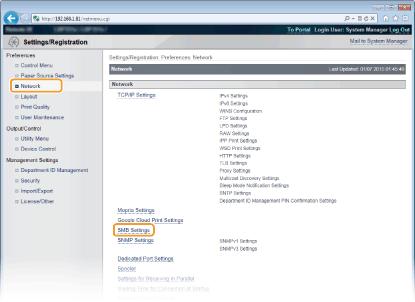
Click [Network]  [SMB Settings].
 [SMB Settings].
4
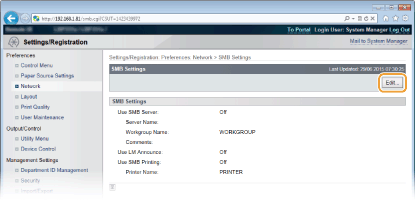
Click [Edit].
5
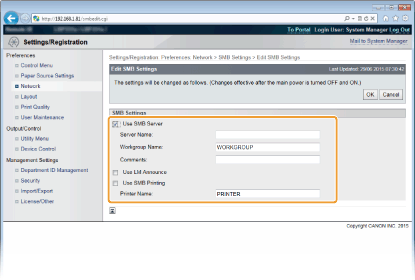
Select the [Use SMB Server] check box and specify the required settings.
[Use SMB Server]
If you select the check box, the computer is indicated as an SMB server on the SMB network.
If you select the check box, the computer is indicated as an SMB server on the SMB network.
[Server Name]
To specify the server name that is to be displayed on the SMB network, you can enter up to 16 characters depending on the character type. The name must be different from the names of any other computers and printers on the network.
To specify the server name that is to be displayed on the SMB network, you can enter up to 16 characters depending on the character type. The name must be different from the names of any other computers and printers on the network.

You cannot use spaces.
A server name set in [SMB Server Name] under [WINS Configuration] is automatically used for [Server Name], if any. A change to the server name in [Server Name] is also applied to [SMB Server Name] under [WINS Configuration].
[Workgroup Name]
To specify the name of the work group to which the machine belongs, you can enter up to 16 characters depending on the character type. If there is no workgroup in your network environment, create a workgroup on Windows and enter the name of the workgroup.
To specify the name of the work group to which the machine belongs, you can enter up to 16 characters depending on the character type. If there is no workgroup in your network environment, create a workgroup on Windows and enter the name of the workgroup.

You cannot use spaces.
A workgroup name set in [SMB Workgroup Name] under [WINS Configuration] is automatically used for [Workgroup Name], if any. A change to the server name in [Workgroup Name] is also applied to [SMB Workgroup Name] under [WINS Configuration].
[Comments]
To create comments on the machine as necessary, you can enter up to 192 characters depending on the character type.
To create comments on the machine as necessary, you can enter up to 192 characters depending on the character type.
[Use LM Announce]
Select the check box to notify the LAN Manager of existence of the machine. If you do not need to notify, clear the check box, reducing a network load.
Select the check box to notify the LAN Manager of existence of the machine. If you do not need to notify, clear the check box, reducing a network load.
[Use SMB Printing]
When using SMB printing with the machine, select the check box.
When using SMB printing with the machine, select the check box.
[Printer Name]
To specify the name of the machine, you can enter up to 13 characters depending on the character type.
To specify the name of the machine, you can enter up to 13 characters depending on the character type.

You cannot use spaces.
6
Click [OK].
7
Perform a hard reset.
Click [Device Control], select [Hard Reset], and then click [Execute].
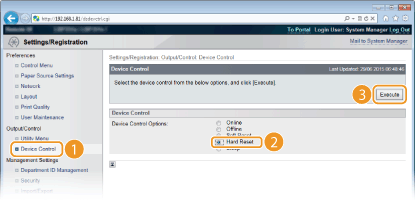
The settings are enabled after the hard reset is performed.
»
Continue to Configuring Settings on the Computer for Printing.