
Printing a Document
This section describes how to print a document on your computer by using the printer driver.
|
|
Paper settings on the machineNormally, it is necessary to specify the paper size and type for the paper loaded in each paper source before proceeding to printing. Specifying Paper Size and Type
By setting <Prioritize Driver Settings When Printing> to <On>, you can print from the paper source specified in the printer driver, regardless of the paper settings on the machine. Prioritize Driver Settings When Printing
|
1
Open a document in an application and display the print dialog box.
How to display the print dialog box differs for each application. For more information, see the instruction manual for the application you are using.
2
Select the printer driver for this machine, and click [Preferences] or [Properties].

The screen that is displayed differs depending on the application you are using.
3
Specify the paper size.
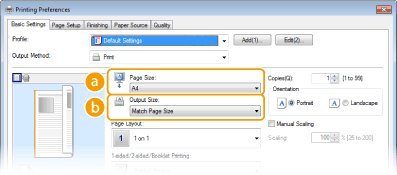
 [Page Size]
Select the size of a document made in the application.
 [Output Size]
Select the size of paper on which the document will be actually printed. If the selected size differs from the one specified in [Page Size], the document is printed enlarged/reduced automatically according to the selected size. Enlarging or Reducing
 |
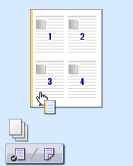
Clickable UIYou can easily specify the page layout, binding position, etc. intuitively on the preview image. For more information, click [Help] on the printer driver screen.
 |
4
Click the [Paper Source] tab, and specify the paper source and paper type.
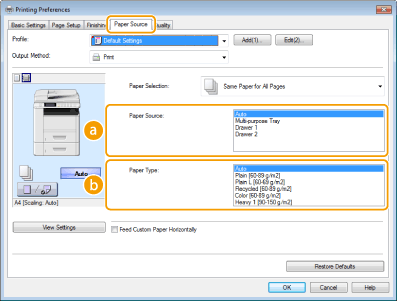 [Paper Source]
Select the paper source from which paper is fed.
|
Setting Value
|
Paper Source
|
|
Auto
|
The paper source is automatically selected according to the specified size and type of the paper to print on and the settings configured in the machine.
|
|
Multi-purpose Tray
|
Paper is fed from the multi-purpose tray.
|
|
Drawer 1
|
Paper is fed from the paper drawer of the machine.
|
|
Drawer 2
|
Paper is fed from the optional paper feeder.
|
[Paper Type]Specify the setting according to the type and basis weight of the paper to print on. Loading Paper
5
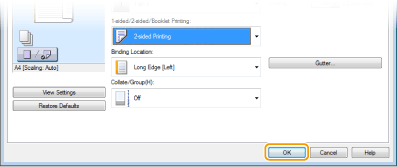
Specify other print settings as necessary. Various Print Settings

You can register the settings you specified in this step as a "profile" and use the profile whenever you print. You can eliminate the need to specify the same settings every time you print. Registering Combinations of Frequently Used Print Settings
6
Click [OK].
7
Click [Print] or [OK].
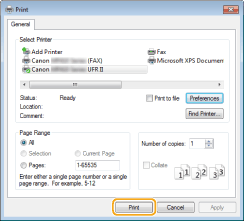
Printing starts. On some applications, a screen like shown below appears.

To cancel printing, click [Cancel] when the screen shown above is displayed. After the screen disappears or if the screen is not displayed, you can cancel printing in other ways. Canceling Prints
|
|
When printing from the Windows Store app in Windows 8/Server 2012Display the charms on the right side of the screen and use the procedure shown below.
Windows 8/Server 2012
Tap or click [Devices] Windows 8.1/Server 2012 R2
Tap or click [Devices] If you print using this method, only a limited number of print settings are available.
If the message [The printer requires your attention. Go to the desktop to take care of it.] is displayed, go to the desktop and follow the instructions in the displayed dialog box. This message appears when the machine is set to display the user name during printing and similar instances.
|