Scanning Documents Directly to USB Memory
This section describes how to scan documents to save directly in a USB memory device connected to the machine. Scanned documents are saved as JPEG images, PDF files or in other digital file formats.
Available USB Memory Devices
You can use USB memory devices with the following format styles.
FAT16 (memory capacity: up to 2 GB)
FAT32 (memory capacity: up to 32 GB)
 |
|
Do not use non-standard USB memory devices. You may not be able to save data properly in some USB memory devices.
USB memory devices cannot be connected via a USB hub or an extension cable.
Do not use USB memory devices with special functions such as built-in security functions.
|
 |
|
The USB port on the front of the machine supports USB 2.0.
If a folder in a USB memory device has many files, saving scanned data will take more time. Use your computer to delete unnecessary files on your USB memory device or move them to a different folder.
|
1
Connect a USB memory device to the USB port on the front of the machine.
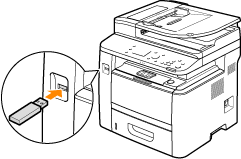

Do not remove the USB memory device or shock or shake the device or the machine when data is being read or written. Also, do not turn OFF the machine while the processing is in progress.
2
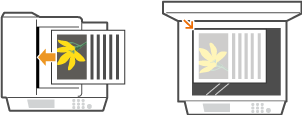
Place the document(s). Placing Documents
3
Press  and tap <Scan>.
 and tap <Scan>.
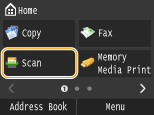
When the logon screen appears, use the numeric keys to enter the user name and password. Then select the authentication server and press  . Logging on to Authorized Send.
 . Logging on to Authorized Send.
4
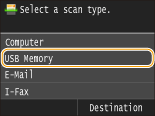
Tap <USB Memory>.
5
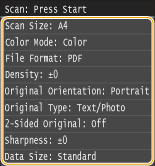
Specify the scan settings as necessary.
Select the settings. Specifying Detailed Settings
6
Press  .
.
 .
.Scanning of the document starts.
To cancel scanning, tap <Cancel>  <Yes>.
 <Yes>.
 When placing documents in the feeder in step 2
When scanning is complete, the scanned data is saved in the USB memory device.
 When placing documents on the platen glass in step 2
When scanning is complete, follow the procedures below (except if you selected JPEG as a file format in step 5).
|
1
|
If there are additional pages of documents to be scanned, place the next document on the platen glass, and press
 . .Repeat this step until you finish scanning all of the pages.
When there is only one page to be scanned, proceed to the next step.
|
|
2
|
Tap <Finish>.
The scanned data is saved in the USB memory device.
|

How the folders to save scanned data and files are named
When scanning is complete, a folder is automatically created in the USB memory device to save the scanned data. Folders and files are named as follows.
|
Folder Name
|
The "SCAN_00" folder is created and up to 100 files are saved in the folder. The folders "SCAN_01" to "SCAN_99" are then created when the current folder becomes full of 100 files.
|
|
File Name
|
File names from "SCAN0000.XXX" to "SCAN9999.XXX" are given to the scanned data files ("XXX" is the extension for the file format such as "JPG"). For the first two numerical digits, the same number is allotted as that of the folder number in which the files are saved. For example, The fifth JPEG file stored in the "SCAN_01" folder is named "SCAN0105.JPG".
|
7
Tap <Close>.
8
Disconnect the USB memory device from the USB port.
|
1
|
Press
 . . |
|
2
|
Press
 . . |
|
3
|
Tap <Device Status>.
|
|
4
|
Tap <Remove Memory Media>.
Wait until the message <The memory media can be safely removed.> is displayed.
|
|
5
|
Disconnect the USB memory device.
|
 |
|
If you always want to scan with the same settings: Changing Default Settings
|