Configuring Personal Folders
Users who log in with personal authentication management can create a Personal folder for individual use. A Personal folder can be specified as the send destination for scanned documents, and it can be created in a shared folder or on a file server. Users can easily send documents to their Personal folders, which can effectively prevent information leakage due to operation errors. Three different ways to specify a Personal folder are described below. After a user with Administrator privileges selects how to specify Personal folders, he or she needs to notify users of the location and instruct them to create their Personal folders.
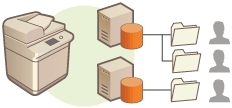
Creating Folders in Any Location Specified by Users
Users create a Personal folder in any location they desire. This enables each user to send documents to a folder in a familiar location.
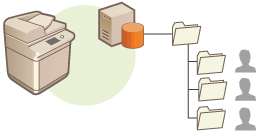
Creating Folders in a Home Folder Specified by the Administrator
Users create a Personal folder inside a parent folder (home folder) specified by the administrator. Personal folders are easier to manage because they are all kept together in one location. A Windows (SMB) shared folder or WebDAV server can be specified.
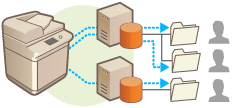
Creating Folders in a Location Specified by the Server
The location of Personal folders is specified based on the user information registered on an authentication server, such as Windows server with Active Directory. Only a Windows (SMB) shared folder can be specified.
Setting How to Specify the Location of Personal Folders
1
Press  .
.
 .
.2
Press <Function Settings>  <Send>
  <Common Settings>
  <Personal Folder Specification Method>.
 <Send>
  <Common Settings>
  <Personal Folder Specification Method>.
3
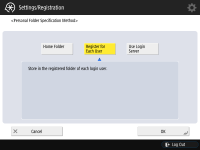
Select how to specify the location of Personal folders.
 Creating folders in any location specified by users
Press <Register for Each User>  <OK>. Each user can specify the location of the Personal folder.
 <OK>. Each user can specify the location of the Personal folder.
 Creating folders in a home folder specified by the administrator
|
1
|
Press <Home Folder>
 <Set>. <Set>.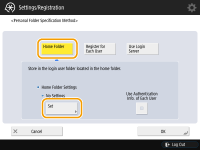 |
|
2
|
Specify the home folder and press <OK>.
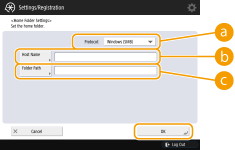  <Protocol> <Protocol>Select the protocol to use when sending scanned documents to the Personal folder.
 <Host Name> <Host Name>Enter the host name or IP address of the computer where you want to create the home folder.
 <Folder Path> <Folder Path>Enter the folder path for the home folder. For example, enter "users\public\share" for a home folder created inside a subfolder named "share" in the "Public" folder on the C: drive (path: "C:\users\public\share").
 You may not be able to specify the path if there are too many folder levels.
|
|
3
|
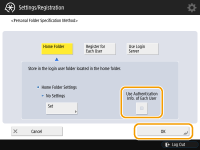
Select the authentication information to use, and press <OK>.
To use a separate user name and password for the Personal folder, press <Use Authentication Info. of Each User> to add a check mark. Remove the check mark to use the same user name and password entered at login. If a check mark is added to this item, a user name and password must be registered for each user.
 |
 Creating folders in a location specified by the server
|
1
|
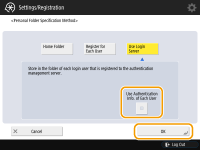
Press <Use Login Server>.
|
|
2
|
Select the authentication information to use, and press <OK>.
To use a separate user name and password for the Personal folder, press <Use Authentication Info. of Each User> to add a check mark. Remove the check mark to use the same user name and password entered at login. If a check mark is added to this item, a user name and password must be registered for each user.
 |
 |
Registering a Personal folder and authentication information for each userThe Personal folder and user name/password can be set for each user by pressing <Scan and Send>
   <Register/Edit Information for Each User> <Register/Edit Information for Each User>  <Personal Folder>. <Personal Folder>. |