
Clearing Jams
If a paper jams, <Paper jammed.> is displayed on the screen. Press <Next> to display simple solutions. If it is difficult to understand the procedures on the display, see the following sections to clear jams.

When removing the jammed paper, do not turn OFF the machineTurning OFF the machine deletes the data that is being printed.
If paper tearsRemove all the paper fragments to prevent them from becoming jammed.
If paper jams repeatedlyTap the paper stack on a flat surface to even the edges of the paper before loading it into the machine.
Check that the paper is appropriate for the machine.
Check that no jammed paper fragments remain in the machine.
Do not forcibly remove the jammed document or paper from the machineForcibly removing the paper may damage parts. If you are not able to remove the paper, contact your local authorized Canon dealer.
|
Paper Jams in the Drawer 1
1
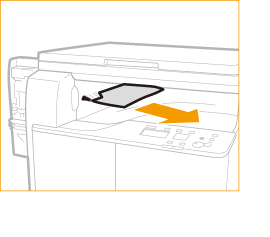
Remove the jammed paper from the output tray.
2
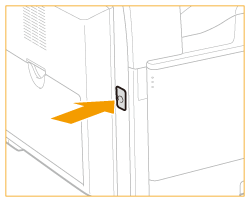
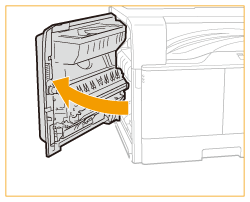
Press the button on the left cover of the main unit, and open the left cover.
3
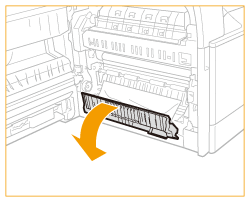
Open the drawer 1 left cover.
4
Remove the jammed paper.
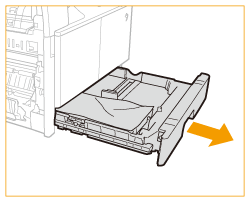
5
Grip the handle, and pull out the drawer 1 until it stops.
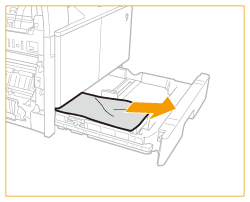
6
Remove the jammed paper.
7
Gently push the drawer 1 back into the machine until it clicks.
8
Close the drawer 1 left cover.
9
Place your hand where the hand symbol is located on the left cover of the main unit, and then gently close the left cover until it clicks into place in the closed position.
Paper Jams around the Output Area
1
Remove the jammed paper from the output tray.
2
Press the button on the left cover of the main unit, and open the left cover.
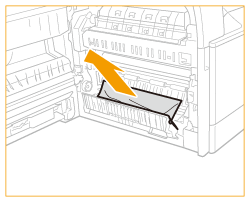
3
Remove the jammed paper.

 |
|
The fixing assembly and its surroundings inside the printer are hot during use. Make sure the fixing assembly is completely cool before removing the jammed paper. Touching the fixing assembly when it is still hot may result in burns.
|
4
Open the drawer 1 left cover.
5
Remove the jammed paper.
6
Close the drawer 1 left cover.
7
Place your hand where the hand symbol is located on the left cover of the main unit, and then gently close the left cover until it clicks into place in the closed position.
Paper Jams around the Fixing Assembly
1
Remove the jammed paper from the output tray.
2
Press the button on the left cover of the main unit, and open the left cover.
3
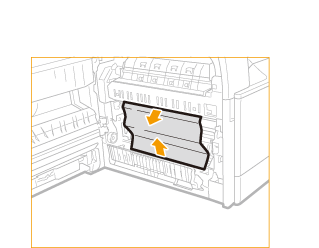
Open the drawer 1 left cover.
4
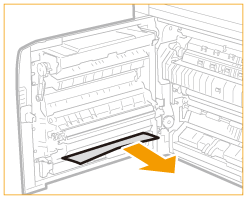
Remove the jammed paper.
|
|
|
The fixing assembly and its surroundings inside the printer are hot during use. Make sure the fixing assembly is completely cool before removing the jammed paper. Touching the fixing assembly when it is still hot may result in burns.
|
5
Close the drawer 1 left cover.
6
Place your hand where the hand symbol is located on the left cover of the main unit, and then gently close the left cover until it clicks into place in the closed position.
Paper Jams in the Multi-Purpose Tray
1
If paper is loaded in the multi-purpose tray, remove the paper.

2
Press the button on the left cover of the main unit, and open the left cover.
3
Remove any jammed paper.
4
Place your hand where the hand symbol is located on the left cover of the main unit, and then gently close the left cover until it clicks into place in the closed position.