Managing the Address Book
You can manage the Address Book data on the Remote UI as well as on the machine’s control panel. The types of addresses are as follows:
E-mail Address
You can manage e-mail addresses.
I-fax Address
You can manage I-fax addresses.
File Server Address
You can manage file server addresses with the information to save scanned documents in a file server, such as the protocol and path name of the destination folder.
Fax Number
You can manage fax numbers.
Group Address
You can manage group addresses, which enable you to include multiple addresses in a single group.
|
NOTE
|
|
For instructions on how to manage the Address Book on the machine’s control panel, see Удобные и быстрые способы указания адресатов.
|
Editing the Destinations
You can register, edit, or delete the destinations in the Address Book.
|
NOTE
|
|
The screen shots and procedures in this section are for the Address Book. The Address Book and One-touch Speed Dial use a similar procedure for editing destinations.
|
1
Click [Address] → [One-touch Speed Dial] or [Address Book] from the menu displayed under [Address].
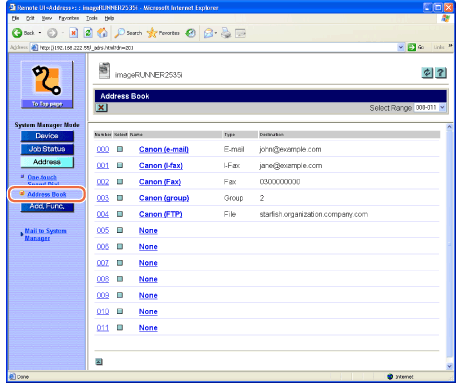
If the address book is protected by a password, the Enter password page appears. Enter the password → click [OK].
The Address Book page is displayed.
|
NOTE
|
|
You can select the address numbers to display from the [Select Range] drop-down list box.
|
2
Edit the destinations.
To register a new destination:
|
1
|
Click [None] or any number for which [None] is displayed.
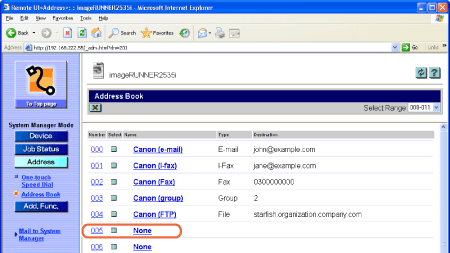 The Register New Address page is displayed.
|
|
2
|
Select the type of the address from the [Type] drop-down list box → specify the necessary settings depending on the type of address you selected → click [OK].
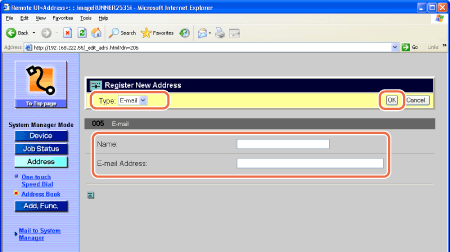 The new address is registered in the machine, and the page returns to the Address Book page.
NOTE:
For more information on the address types, see Удобные и быстрые способы указания адресатов.
|
To register a new group address:
|
1
|
Click [None] or any number for which [None] is displayed on the page shown in step 1.
The Register New Address page is displayed.
|
|
2
|
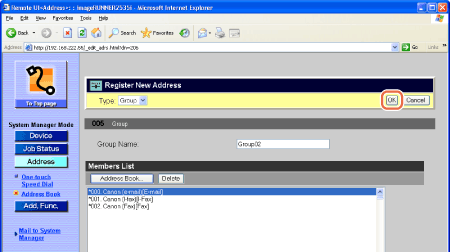
Select <Group> from the [Type] drop-down list box.
|
|
3
|
Enter the name for the group in the [Group Name] text box.
|
|
4
|
Click [Address Book].
The list of addresses registered in the machine is displayed in the new window.
|
|
5
|
Specify the type of address from the drop-down list box.
|
|
6
|
Select the check boxes next to the addresses you want to include to the group → click [OK].
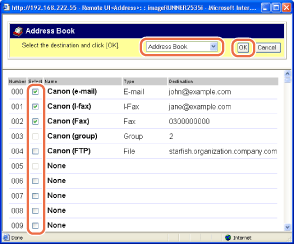 The selected addresses are displayed in the [Members List].
 |
|
7
|
Make sure that the addresses you want to add to the group are displayed in the Members List field → click [OK].
The new group address is registered and the page returns to the Address Book page.
|
To edit the details of the destination:
|
1
|
Click the name or any number next to the name on the Address Book page shown in step 1.
The Destination Details page appears.
|
|
2
|
Click [Edit].
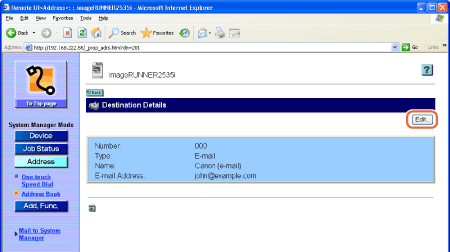 The Edit Destination page is displayed.
|
|
3
|
Edit the settings as necessary → click [OK].
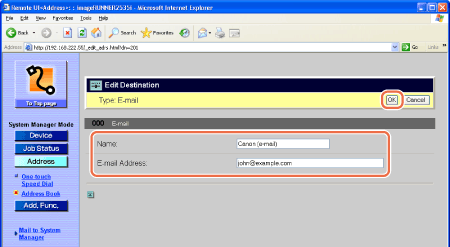 The page returns to the Address Book page.
|
To delete the destination:
|
1
|
On the Address Book page shown in step 1, click [
The selected destination is deleted.
|