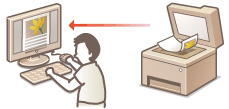
Scanning with AirPrint
You can use AirPrint to transfer the data scanned by the machine directly to a Mac.

System Requirements
To scan with AirPrint, you need a Mac with OS X 10.9 or later installed. To scan using TLS, you need a Mac with OS X 10.11 or later installed.
Network Environment
One of the following environments is required.
An environment where an Apple device and the machine are connected to the same LAN
An environment where a Mac is connected to the machine via USB
 |
|
For scanning, it is required to set <Use Network Link Scan> to <On>. Changing the Setting of Functions Available with AirPrint
Before scanning, it is required to put the machine into online state. When the auto online function (<Auto Online>) is set to <Off>, first put the machine into online state by selecting <Scan>
/b_key_arrow_right.gif) <Remote Scanner>, then start the procedure for scanning. <Remote Scanner>, then start the procedure for scanning.You cannot scan while settings for operations are being made, or while the machine is performing any operation whatsoever.
|
Scanning from a Mac
1
Make sure that the machine is turned ON and connected to the Mac.
For how to make sure of this, see Setting Up the Network Environment.
2
Add the machine to the Mac from [System Preferences] /b_key_arrow_right.gif) [Printers & Scanners].
[Printers & Scanners].
/b_key_arrow_right.gif) [Printers & Scanners].
[Printers & Scanners].If the machine has already been added, this operation is not required.
3
Select this machine from the list of printers in [Printers & Scanners].
4
Click [Scan].
5
Click [Open Scanner].
The [Scanner] screen is displayed.
6
Configure the scan settings as necessary.
7
Click [Scan].
The original is scanned, and the image is displayed.