
Setting Up Connection Using WPS Push Button Mode
1660-00J
If your wireless router supports WPS push button mode, you can easily set up a connection with a WPS button.
|
|
|
How to operate the wireless router may vary on each device. See the instruction manuals for your networking device for help.
|
1
Select <Menu> in the Home screen. Home Screen
2
Select <Preferences> /b_key_arrow_right.gif) <Network>.
<Network>.
If the login screen appears, enter the correct ID and PIN. Logging in to the Machine
3
Select <Wireless LAN Settings>.
If the <Do you want to enable the wireless LAN?> message is displayed, select <Yes>.
4
Read the message that is displayed, and select <OK>.
5
Select <WPS Push Button Mode>.
6
Select <Yes>.
7
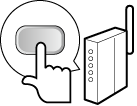
Press and hold the WPS button on the wireless router.
The button must be pressed within 2 minutes after selecting <Yes> in step 6.
Depending on the networking device, you may need to press and hold the button for 2 seconds or longer. See the instruction manuals for your networking device for help.

If an error message is displayed during setup
Select <Close> and return to step 5.
8
Wait until message <Connected.> is displayed.
9
Select <Close>.
Wait several minutes until the IP address and other items are set automatically.

Signal strength
When more than one wireless router is available for connection, the machine connects to the device with the strongest signal. Signal strength is measured using RSSI (Received Signal Strength Indication).
You can set the IP address manually. Setting IP Addresses
While the machine is connected to the wireless LAN, the Wi-Fi icon is displayed in the Home screen or the Basic Features screen of each function. Basic Screens
 |
Reducing power consumptionYou can set the machine to enter <Power Save Mode> based on signals emitted from the wireless router. <Power Save Mode>
If the IP address of the machine has changedIn a DHCP environment, the IP address of the machine may be changed automatically. If this happens, the connection is maintained as long as the machine and the computer belong to the same subnet.
|