Specifying Paper Size and Type in the Paper Drawer
1
Select <Paper Settings> in the Home screen. Home Screen
2
Check the paper size and type that is displayed.
When loading standard size paper, the paper size is automatically detected. If both paper size and paper type are correct, the following operation is not necessary.
 and
and  are displayed only when the optional cassette feeding unit is installed.

If the displayed paper size is different from the loaded paper size, the paper may not be loaded properly. Load the paper again.
3
Select the target paper drawer.
4
Select paper size.

 When setting the standard size paper type
1 | Select <Auto>. |
2 | Select the paper type.  |
When loading custom size paper
1 | Select <Custom Size>. |
2 | Specify the length of the <X> side and <Y> side. Select <X> or <Y>, and enter the length of each side using <+>/<->, with  / / to move the cursor between the digits for inputting whole numbers and fractions. to move the cursor between the digits for inputting whole numbers and fractions. If you register the paper size you use frequently on buttons <S1> to <S3>, you can call them up with one touch. Registering a Custom Paper Size |
3 | Select <Apply>. |
4 | Select the paper type. |
When loading envelopes
Envelopes can not be set in the paper drawer 3 and 4.
1 | Select <Envelope>. |
2 | Select envelope type. If you selected Nagagata 3 for  , press <Next>, and specify the flap length. , press <Next>, and specify the flap length. |
3 | Select <Apply>. |
5
Change the paper size label of the paper drawer as necessary.
Attach the paper size label at the same height as the cassette number indicator, and approximately 1/4" (5 mm) to the left.
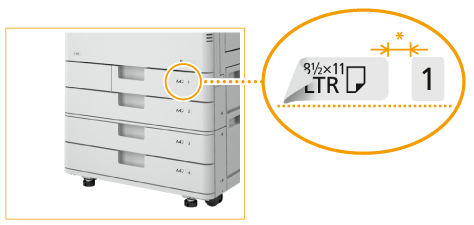 |
* Approximately 1/4" (5 mm)

Note that the paper size label may include paper sizes which are unavailable on the machine.