Import User Settings
This section describes how to import the user settings file to the Desktop that has been installed on the destination computer. Prepare the exported user setting file in advance.
|
NOTE
|
|
If the version of Desktop installed on the destination computer is older than the version of Desktop on the source computer, you cannot import the settings.
Depending on your environment, you may need to restart the computer after the settings have been imported.
|
1.
Close all programs related to Desktop.
|
NOTE
|
|
If a program related to Desktop is running, an error message will be displayed during the import process. Follow the instructions in the message.
|
2.
Select the [Start] menu > [All Programs] > [Canon imageRUNNER ADVANCE] > [iR-ADV Desktop] > [imageRUNNER ADVANCE Desktop Import & Export Tool].
The Import & Export Tool screen is displayed.
|
NOTE
|
|
For Windows 8.1, click
For Windows 10, select the [Start] menu > [All apps] > [Canon imageRUNNER ADVANCE] > [imageRUNNER ADVANCE Desktop Import & Export Tool].
|
3.
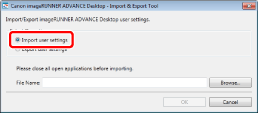
Select [Import user settings].

4.
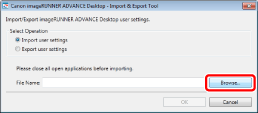
Click [Browse].

The [Open] dialog box is displayed.
5.
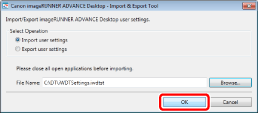
Select the user setting file (iWDTSettings.iwdtst), and click [Open].
6.
Click [OK].

When the import process of the user settings is complete, a message is displayed.
7.
Click [OK].
|
NOTE
|
|
If import of the resource file (an image or audio file) has failed, a message is displayed. Check the following.
Maximum length of the file path
Access rights for the specified file path
Whether the specified resource file exists
|