Enlarging/Reducing Original Pages
You can enlarge or reduce each page within the area where the selected printer can print (i.e., valid print area) according to the print settings that are specified in documents.
|
NOTE
|
|
If the [Display a printable area in the print preview] check box is selected, the valid print area is displayed on the Work Window.
Select the [File] menu > [Option] > [System Settings] > [Editor] > [Options] > [Display a printable area in the print preview].
|
1.
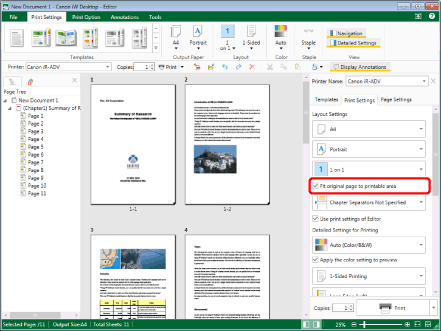
Select the [Fit original page to printable area] check box in [Layout Settings] on the [Print Settings] tab on the Details Window.
Or, select the [Fit to Printable Area] check box on the ribbon.

The Work Window is updated according to the settings.
|
NOTE
|
|
If the Details Window is not displayed, see the following.
The valid print area varies depending on the printer selected in [Printer].
When selecting [Auto (Size)] for the output paper size without selecting the [Fit original page to printable area] check box and printing, the size selected for each original page automatically may be smaller than the original page size. In this case, the area that exceeds the output paper size may not be printed.
When printing a document without selecting the [Fit original page to printable area] check box, the area over the valid print area of original page cannot be printed. In addition, the annotations attached on the area being over the valid print area may not be printed correctly. In this case, a warning message is displayed when printing or exporting to a PDF file.
If commands are not displayed on the ribbon of Desktop Editor, see the following to display them.
This operation can also be performed with the tool buttons on the toolbar. If tool buttons are not displayed on the toolbar of Desktop Editor, see the following to display them.
|