Uninstalling the Driver
This explains the procedure for uninstalling a driver.
There are two methods for uninstalling: starting the uninstaller from Windows, and using the uninstall file.
Prerequisites
When starting the computer, log on as a user with administrator privileges.
[Desktop] screen display (when using Windows 8.1/Server 2012/Server 2012 R2)
Procedures
1.
Start the uninstaller of the driver.
When using Windows functions
If starting from [ Settings] in the Start menu
Settings] in the Start menu(1) Display [Apps] (or [System]) > [Installed apps] (or [Apps & features]).
(2) Click [⋯] for the driver you want to uninstall (or select the driver) → click [Uninstall].
If starting from [Control Panel]
(1) Display [Programs] > [Uninstall a program].
(2) Select the driver you want to uninstall → select [Uninstall/Change] from the menu.
When using the uninstall file provided with the driver
Double-click one of the following files.
When using a file in an installed driver folder
Use [UNINSTAL.exe] corresponding to the driver in the following folder.
<install folder>\Canon\PrnUninstall
When using the file in the accompanying CD-ROM or downloaded driver folder
Use the following file in the folder of the driver you have acquired.
misc\UNINSTAL.exe
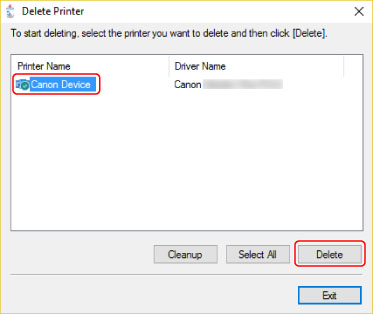
Select the name of the device you want to uninstall → click [Delete].
[Cleanup]: Click this to simultaneously delete all files and registry information relating to all of the drivers displayed in the list, not just the selected driver. Click [Delete] to perform a normal uninstallation of the driver.
3.
In the screen for confirming whether to delete the printer, click [Yes].
4.
In the [Delete Printer] screen, click [Exit].