Capturing Images with the Camera
Use the camera to take photographs and import them into this app in PDF format. You can trim and correct distortion of the image prior to PDF conversion.
Procedures
1.In the Canon PRINT Business home screen, tap [Capture].
When the dialog box for selecting an app is displayed
Select the camera app to be used.
2.Photograph the document you want to read.
3.Select the required part of the image in the [Corr. Distortion (Trapezoid)] screen.
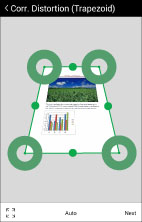
Adjusting the boundary
[ ]/[
]/[ ]:
]:
Tapping [] selects the entire area. Tapping [] automatically sets the area.
[ ]/[
]/[ ]:
]:
Moving []/[] enables you to manually adjust the area.
Selecting a vertical to horizontal ratio
[Auto]/[A4]/[LTR]:
The selected part of the image is corrected to match the selected height to width ratio.
4.Tap [Next].
5.Correct the image in the [Image Processing Mode] screen.
[ ]:
]:
Rotates the image to the left.
[Paper]:
A suitable mode for capturing the original paper.
[Whiteboard 1]:
A suitable mode for capturing images on the whiteboard. It enables you to remove shadows, irregularities, and reflections.
[Whiteboard 2 (Thick)]:
A suitable mode for capturing images on the whiteboard. It enables you to not only remove shadows, irregularities, and reflections, but also correct the blurred letters and lines.
[Off]:
Correction is not performed.
6.Tap [Store].
Select the compression rate.
A preview of the saved PDF is displayed.
NOTE |
In the case of [Whiteboard 1], blurred letters and lines may be broken up. [Whiteboard 2 (Thick)] cannot correct all blurred letters and lines. |