Opening Checked Out Documents
When a document in a Document Server Library or SharePoint Server Library or Therefore Library is opened, its copy is created and saved in the check out folder.
You can open a document in the check out folder.
|
NOTE
|
|
Documents saved in the check out folder are processed as follows when check in or check out is canceled.
Check in: Deleted from the check out folder and saved in the original folder as the newest version of the document
Canceling check out: Deleted from the check out folder and the document is restored to as it was before being checked out
If the check out folder has a document and you have checked out that document, it cannot be renamed. Rename the document after checking it in.
|
1.
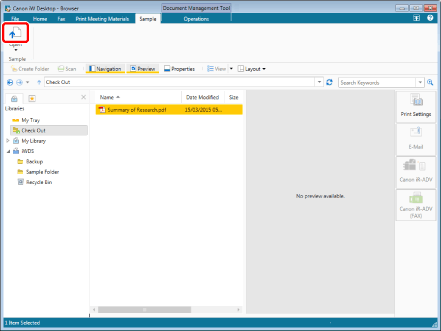
Select the check out folder from the Navigation Window.
The document in the check out folder is displayed in the File List View Window.
2.
Select a document in the File List View Window.
3.
Click the icon for the ribbon command.
Or, follow one of the steps described below.
Click ▼ for [Open] on the ribbon, and select [Open]
Click [Open] on the ribbon
Right-click and select [Open]
Double-click the document
Select a document and then press the [Enter] key on the keyboard

The application that associated with the document format starts and displays the document.
|
NOTE
|
|
When multiple documents are selected, the following occurs.
[Open] cannot be selected if different extensions are included or shortcut files (*.iwl) are included.
A maximum of 10 documents can be opened with a single operation. If you select 11 or more documents, only the first documents are opened.
If you select 11 or more documents, you cannot use the [Enter] key.
If commands are not displayed on the ribbon of Desktop Browser, see the following to display them.
This operation can also be performed with the tool buttons. If tool buttons are not displayed on the toolbar of Desktop Browser, see the following to display them.
|