Configuring the Enlargement/Reduction Setting on a Page Basis
You can configure the enlargement/reduction setting for the specified page differently from the entire document or a chapter basis.
|
NOTE
|
|
The enlargement/reduction setting is prioritized in the order page > chapter > document.
If the [Display a printable area in the print preview] check box is selected, the valid print area is displayed on the Work Window.
[File] menu > [Option] > [System Settings] > [Editor] > [Options] > [Display a printable area in the print preview]
For more information on how to configure the enlargement/reduction setting for the entire document, see the following.
For more information on how to configure the enlargement/reduction setting on a chapter basis, see the following.
For more information on how to cancel the setting on a on a page basis, see the following.
|
1.
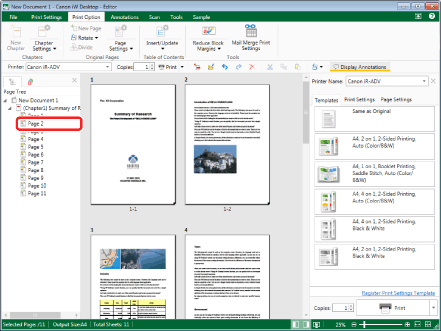
Select the page where you want to apply the enlargement/reduction setting to on the [Page Tree] tab on the Navigation Window.

|
NOTE
|
|
If the [Page Tree] tab on the Navigation Window is not displayed, see the following.
|
2.
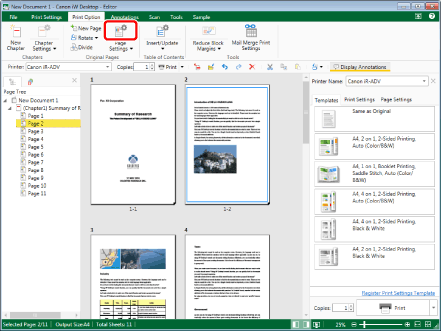
Click the icon for the ribbon command.
Or, follow one of the steps described below.
Select [Page Settings] on the ribbon > [Original Page Settings]
Click [Original Page Settings] on the ribbon
Right-click and select [Original Page Settings]

[Original Page Settings] is displayed.
|
NOTE
|
|
If commands are not displayed on the ribbon of Desktop Editor, see the following to display them.
This operation can also be performed with the tool buttons. If tool buttons are not displayed on the toolbar of Desktop Editor, see the following to display them.
|
3.
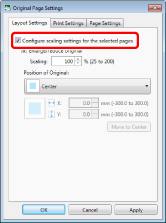
Select the [Configure scaling settings for the selected pages] check box on the [Layout Settings] tab.

4.
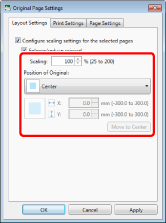
Configure the enlargement/reduction ratio and placement of original pages.

|
[Enlarge/reduce original]
|
Select this check box to enlarge/reduce the size of original pages.
|
|
[Scaling]
|
Configure the size of original pages using the enlargement/reduction ratio. You can enter a value or use
|
|
[Position of Original]
|
Select one of the following positions on the print page where you want to place the original pages.
[Upper Left]
[Middle Left]
[Lower Left]
[Upper Middle]
[Center]
[Lower Middle]
[Upper Right]
[Middle Right]
[Lower Right]
[Specify Position]: Enter values in [X] and [Y] to set the position.
|
|
[Move to Center]
|
Moves the original pages to the center.
|
|
NOTE
|
|
[Scaling] being 100% does not mean that the original size is being retained. Instead, the size of original pages is enlarged or reduced to fit the print area according to the settings configured for the entire document or for each chapter. With this fact in mind, configure the numeric values on a page basis.
The annotations and headers/footers attached to the page may not be printed correctly depending on [Position of Original] and [Scaling].
If the margins are configured for the entire document or on a chapter basis, you may not be able to move the annotations or header/footers to the specific position, even if [Position of Original] or [Move to Center] is configured on a page basis.
Click [Apply] to check the document preview in the Work Window without closing [Original Page Settings].
|
5.
Click [OK].
The page icon displayed on the [Page Tree] tab on the Navigation Window changes and the page number changes to blue.
|
NOTE
|
|
To cancel the enlargement/reduction ratio, right-click the page to cancel the settings for on the [Page Tree] tab of the Navigation Window, and select [Do Not Scale Originals of Selected Pages].
|