Adding a New Image Stamp
You can add new image stamps to Desktop Editor.
1.
Select [Stamp] on the ribbon > [Manage Stamps].
Or, follow one of the steps described below.
Click  (Manage Stamps) on the ribbon
Click [Manage Stamps] on the ribbon
Select the [File] menu > [Settings/Management] > [Manage Stamps]
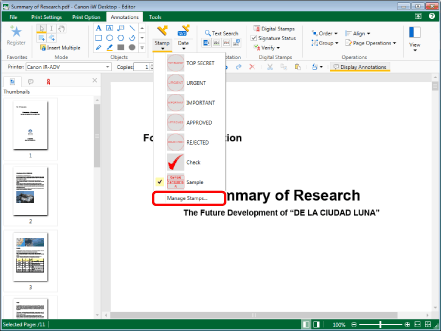
[Manage Stamps] is displayed.
|
NOTE
|
|
If commands are not displayed on the ribbon of Desktop Editor, see the following to display them.
This operation can also be performed with the tool buttons. If tool buttons are not displayed on the toolbar of Desktop Editor, see the following to display them.
|
2.
Click [Add].
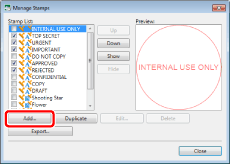
[Add New Stamp] is displayed.
3.
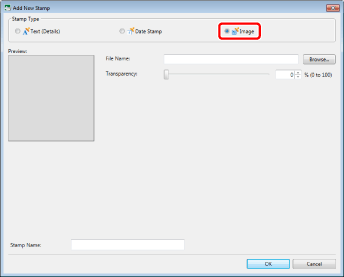
Select [Image] in [Stamp Type].
4.
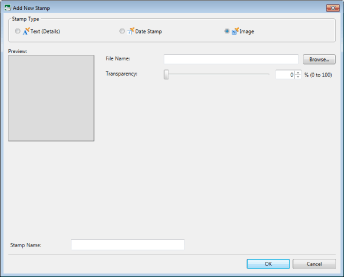
Select the image to use for the image stamp and set the transparency.
|
[File Name]
|
Click [Browse] and specify the image file to use in the image stamp. Or, specify the path of the image file to use in the image stamp using up to 259 characters (total number of 2-byte and 1-byte characters).
|
|
[Transparency]
|
The slider position and the numeric value indicate the degree of transparency of the stamp. To change the degree of transparency, move the slider to the left or right, or enter a numeric value. You can also use
|
|
NOTE
|
|
The following image file formats can be used for image stamps.
BMP
TIFF (For a multi-page TIFF image, the first page is used. TIFF images including transparent parts also can be used.)
JPEG
PNG
GIF
The types of image files that can be inserted may increase, depending on the codecs installed in your computer.
|
5.
Enter a name in [Stamp Name].
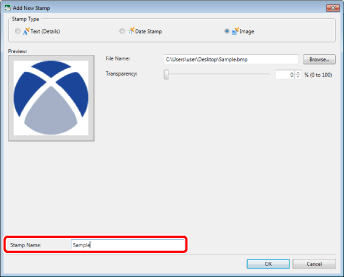
|
NOTE
|
|
Enter the stamp name using 31 characters or less.
You cannot set the same name as an existing stamp.
|
6.
Confirm the preview display and click [OK].
[Manage Stamps] is displayed again.
The stamp added in [Stamp List] is displayed.
7.
Click [Close].