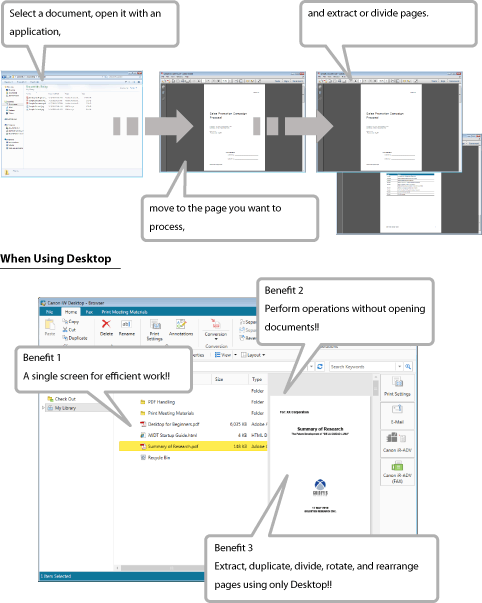
Editing PDF Documents
With Desktop, you can extract, duplicate, divide, rotate, and rearrange pages without opening a PDF document. You can also easily convert a document into a PDF document.
Extracting, Duplicating, Dividing, Rotating, and Rearranging Pages in a PDF Document
You can extract, duplicate, rotate, and rearrange pages displayed in the Preview Window, or divide the document.
Because this operation can be performed without opening the document, work can be made more efficient.
Extracting or Duplicating the Displayed Page
This example shows how to extract or duplicate the page displayed in the Preview Window.
1.
Select the document.
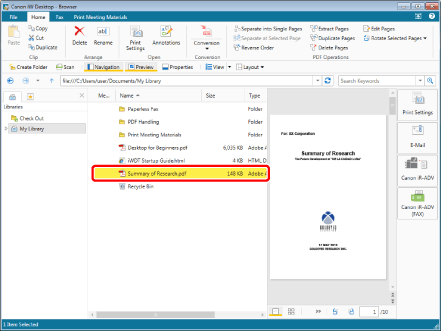
A preview is displayed in the Preview Window.
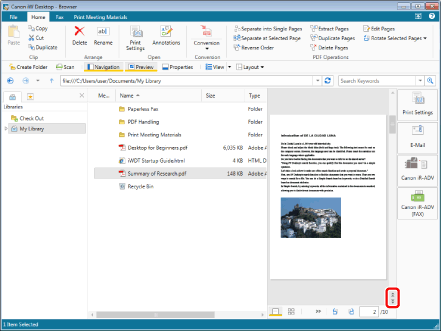
2.
Move to the page you want to extract or duplicate.
Click  or
or  to switch pages.
|
NOTE
|
|
You can also perform one of the following operations to switch pages.
Scroll using the scroll bar on the right side of the Preview Window
Directly enter the page number you want to move to in
|
3.
Click [Extract Pages] or [Duplicate Pages] on the ribbon.
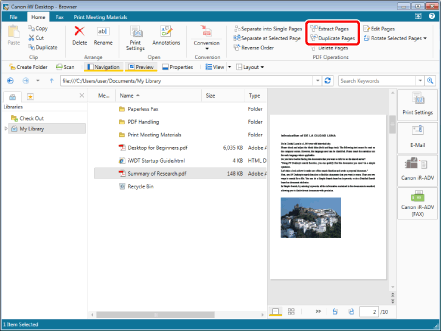
A confirmation message is displayed.
4.
Click [Yes].
The pages are extracted or duplicated and saved in the library.
|
NOTE
|
|
Each of the extracted or duplicated PDF documents is saved with "_selected page number" appended at the end of the source document name. The page number is displayed according to the number of digits in the number of pages before extracting or duplicating. However, if another document with the same name exists in the destination folder, "(2)" is added at the end of "_selected page number".
|
Dividing Documents at the Displayed Page
You can divide documents at the page displayed in the Preview Window.
1.
Select the document.
A preview is displayed in the Preview Window.
2.
Move to the page where you want to divide the document.
Click or to switch pages.
|
NOTE
|
|
You can also perform one of the following operations to switch pages.
Scroll using the scroll bar on the right side of the Preview Window
Directly enter the page number you want to move to in
|
3.
Click [Separate at Selected Page] on the ribbon.
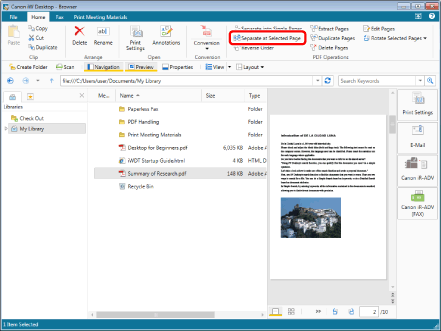
4.
Select [Original Document Processing] and click [OK].
In this example, select [Keep original document].
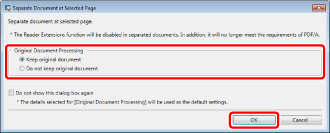
The document is divided at the displayed page.
|
[Keep original document]
|
If you select [Keep original document], the two divided documents are registered to the library, and the original document before division is retained in the library.
|
|
[Do not keep original document]
|
If you select [Do not keep original document], the two divided documents are registered to the library. The original document is not retained.
|
|
[Do not show this dialog box again]
|
If you select this check box, [Separate Document at Selected Page] is not displayed when dividing a document next time. The settings in [Original Document Processing] are used as the default values when this item is selected.
|
|
NOTE
|
|
To display [Separate Document at Selected Page] again, select the [Select original document processing when separating document at selected page] check box.
[File] menu > [Options] > [System Settings] > [Browser] > [Display Dialog Box] > [Select original document processing when separating document at selected page]
|
Rotating the Displayed Page
In the Preview Window, you can rotate the pages of a PDF document and save the document.
1.
Select the document.
A preview is displayed in the Preview Window.
2.
Move to the page you want to rotate.
Click or to switch pages.
|
NOTE
|
|
You can also perform one of the following operations to switch pages.
Scroll using the scroll bar on the right side of the Preview Window
Directly enter the page number you want to move to in
|
3.
Click [Rotate Selected Pages] on the ribbon and select the rotation method.
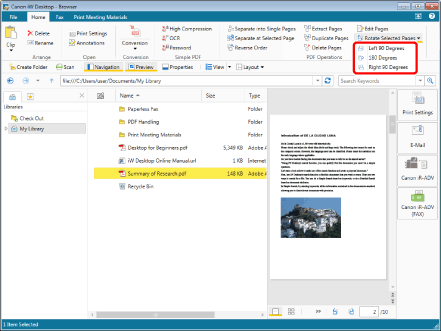
A confirmation message is displayed.
4.
Click [Yes].
The displayed page is rotated.
|
NOTE
|
|
You can also rotate the page and save the document by clicking [Rotate Selected Pages Left 90 Degrees and Save] or [Rotate Selected Pages Right 90 Degrees and Save] on the Preview Window.
|
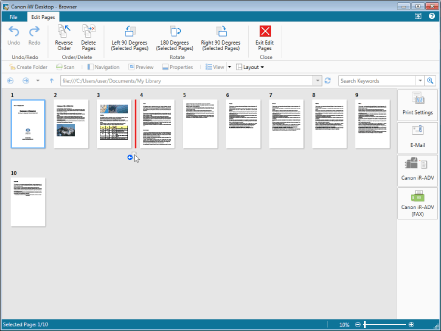
Rearranging Pages
In the Preview Window, you can rearrange the pages of a PDF document.
1.
Select the PDF document to rearrange the pages of in the File List View Window.
2.
Click [Edit Pages] on the ribbon to start the Edit Pages Mode.
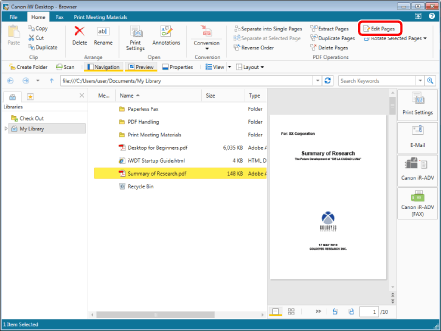
3.
In the Preview Window, select the page to move, and drag and drop it to the destination.
|
NOTE
|
|
You can select multiple pages by clicking them while holding down the [Shift] or [Ctrl] key on the keyboard.
You can drag the mouse from an area of the Preview Window where nothing is displayed to select multiple pages.
|
4.
Click [Exit Edit Pages] on the ribbon.

A confirmation message is displayed.
5.
Click [Yes].
The PDF document is saved.
Adding Annotations to a Document
Desktop Editor enables you to add annotations to documents.
Annotation Type
This section describes the annotations that can be added with Desktop Editor.
|
Text
|
 |
Enables you to insert text.
|
|
Text Box
|
 |
Enables you to insert a text box.
|
|
Comment
|
 |
Enables you to insert a text box with a leading line.
|
|
Line
|
 |
Enables you to insert a straight line.
|
|
Rectangle
|
 |
Enables you to insert a rectangle.
|
|
Oval
|
 |
Enables you to insert an oval.
|
|
Polygon
|
 |
Enables you to insert a polygon.
|
|
Connected Lines
|
 |
Enables you to insert a polygon line.
|
|
Marker
|
 |
Enables you to insert a marker (unframed translucent rectangle).
|
|
Freehand
|
 |
Enables you to insert a free line.
|
|
Mask (Rectangle)
|
 |
Enables you to insert a rectangular mask.
|
|
Mask (Oval)
|
 |
Enables you to insert an oval mask.
|
|
Insert Image
|
 |
Enables you to insert an image.
|
|
Stamp
|
 |
Enables you to insert a text stamp, date stamp, or image stamp.
|
|
Date Stamps
|
 |
Enables you to insert a date mark.
|
|
Digital Stamps
|
 |
Enables you to insert a digital stamp.
|
|
Text Highlight
|
 |
Enables you to insert a text highlight in document text.
|
|
Underline
|
 |
Enables you to insert an underline in document text.
|
|
Strikethrough
|
 |
Enables you to insert a strikethrough in document text.
|
|
Text Note
|
 |
Enables you to insert a text note in document text.
|
How to Insert Annotations
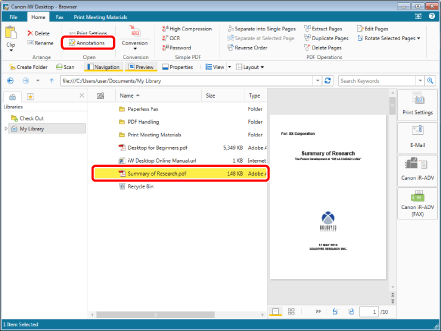
This section describes how to insert annotation comments into a PDF document with an example.
1.
Select the PDF document to add annotations to, and click [Annotations].
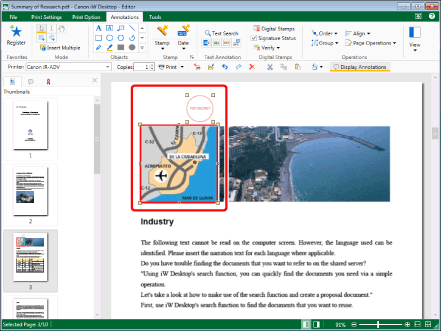
2.
Click (Comment) on the ribbon.
(Comment) on the ribbon.
3.
Click on the position where you want to insert a comment.
The comment is inserted.
4.
Enter text in the text box, and configure the properties of the comment.

|
NOTE
|
|
If the Details Window is not displayed, click
|
5.
Select the [File] menu > [Save] and close the document.
The document is saved.
Making Annotations Easier to Use
You can register annotations in favorites to make it more convenient to add annotations.
When annotations are registered in favorites, they can be inserted from a ribbon when any document is opened.
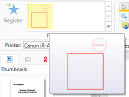
Registering Annotations in Favorites
1.
Select the annotations to register in favorites while holding down the [Shift] key or [Ctrl] key on the keyboard.
2.
Click [Register] on the ribbon.
The selected annotation is registered in the Favorites list on the ribbon.
Inserting Annotations from Registered Favorites
1.
Select the PDF document to add annotations to, and click [Annotations].
2.
In the Favorites list on the ribbon, click the Favorites button to insert.
The annotation registered in favorites is inserted.
|
NOTE
|
|
You can place the mouse cursor over a Favorites button to display what is registered in a pop-up. This enables you to confirm the content of the command before inserting an annotation.
The annotation position information set when the annotations are registered to favorites is also saved.
 |
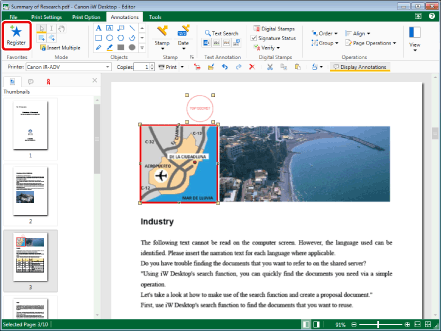
Grouping Annotations
Annotations can be grouped. Grouping annotations enables you to make it easier to select annotations when copying and pasting multiple annotations.
1.
Select the annotations you want to group in the Work Window while holding down the [Shift] key or [Ctrl] key on the keyboard.
2.
Select [Group] on the ribbon > [Group].
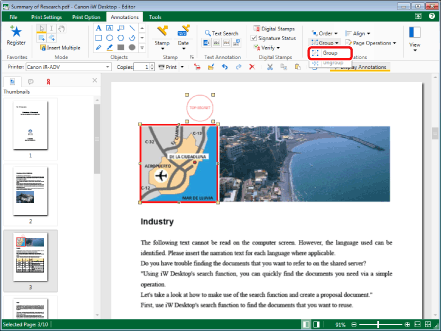
The selected annotations are grouped and become a single annotation.
To ungroup the annotations, select [Group] on the ribbon > [Ungroup].
|
NOTE
|
|
Grouped annotations are enclosed in light blue.
Even when annotations are grouped, you can select individual annotations in the group to edit properties and text, etc.
|
Converting to a PDF Document
With Desktop, you can convert multiple documents into a single PDF document or convert a document into a PDF document with security settings configured.
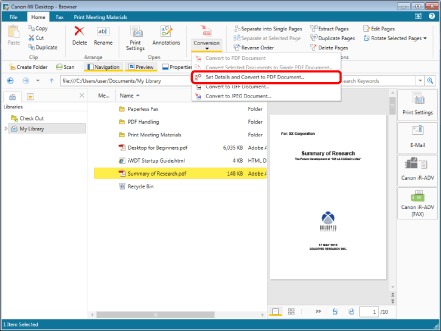
Converting Documents Collectively to a Single PDF Document
1.
Select the documents to convert to a single PDF document while holding down the [Shift] key or [Ctrl] key on the keyboard.
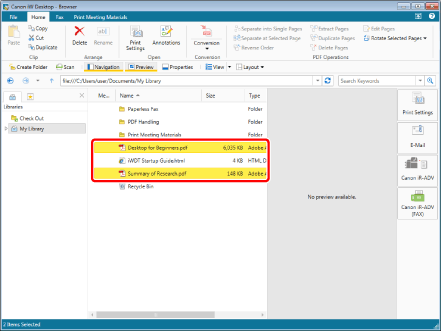
2.
Select [Conversion] on the ribbon > [Convert Selected Documents to Single PDF Document].
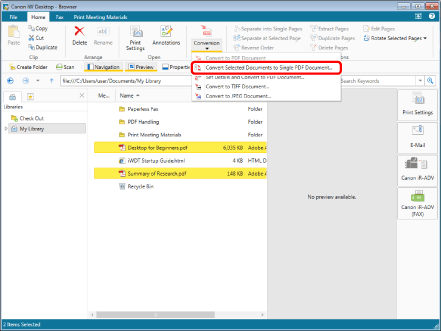
|
NOTE
|
|
If you select [Convert to PDF Document], the documents are converted separately.
If you select [Set Details and Convert to PDF Document], [Detailed Settings for PDF Document] is displayed.
|
3.
Select the order to process the documents and click [OK].
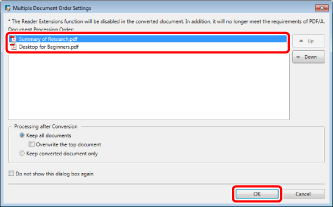
A single PDF document is created.
Converting an IWB Document to a Password Protected PDF Document
You can convert an IWB document that has been opened in Desktop Editor as a PDF document, and export it. Also, you can convert multiple documents with different formats into a single PDF document by creating an IWB document. When doing so, you can encrypt the PDF document with a password to securely transfer files.
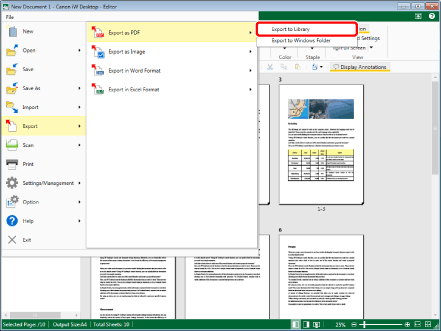
1.
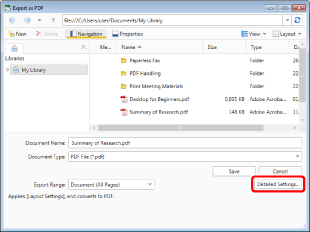
Open an IWB document, and select the [File] menu > [Export] > [Export as PDF] > [Export to Library].
2.
Click [Detailed Settings].
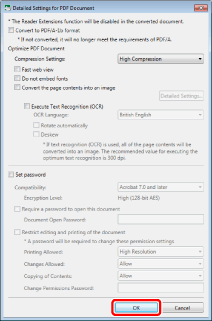
3.
Specify the various settings in [Detailed Settings for PDF Document] and then click [OK].
|
[Convert to PDF/A-1b format]
|
Enables you to convert to a PDF document in the PDF/A-1b format.
|
|
[Compression Settings]
|
Set the compression level of the PDF document.
|
|
[Fast web view]
|
Select this check box to optimize the PDF document for display on the Web.
Converting a PDF document with this check box selected enables the document to be downloaded page by page (with byte-serving) when the PDF has been uploaded to the Web (Cannot be set when the [Convert to PDF/A-1b format] check box is selected). |
|
[Do not embed fonts]
|
Select this check box to convert without using embedded fonts when creating the PDF document (Cannot be set when the [Convert to PDF/A-1b format] check box is selected).
Converting a PDF document without using embedded fonts enables the size of the PDF document to be reduced. |
|
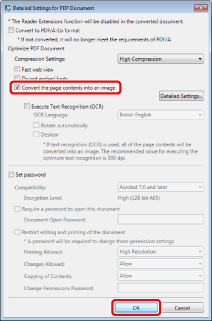
[Convert the page contents into an image]
|
Select this check box to convert all pages in a document that will be converted to a PDF document into TIFF format images.
|
|
[Detailed Settings]
|
Enables you to configure how to convert images.
[Color Mode]: Specifies the color.
[Resolution]: Specifies the resolution.
|
|
[Execute Text Recognition (OCR)]
|
Select this check box to enable text searches for documents converted to TIFF images (OCR function).
If this check box is selected, a check mark is automatically displayed for the [Convert the page contents into an image] check box.
When you convert a large size document, it may take time.
|
|
[OCR Language]
|
Select the language to use for the OCR function from the pull-down list.
|
|
[Rotate automatically]
|
If this check box is selected, the vertical orientation of the document is corrected. Select this check box when the document includes both vertically and horizontally-oriented pages.
|
|
[Deskew]
|
Select this check box to correct the skew of the document. Select this check box when the document is skewed.
|
|
[Set password]
|
Select this check box to restrict PDF access, printing, and editing for security reasons (Cannot be set when the [Convert to PDF/A-1b format] check box is selected).
|
|
[Compatibility]
|
Select one of the formats that are compatible with the converted PDF document.
|
|
[Require a password to open this document]
|
Select this check box to set a password for opening the document.
|
|
[Document Open Password]
|
Enter the password for the PDF document.
|
|
[Require a password to print or edit this document (a password will be required to change these settings)]
|
Select this check box to set a password required for printing or editing the document.
|
|
[Printing Allowed]
|
Specify the conditions for printing. Select either [High Resolution] or [None].
|
|
[Changes Allowed]
|
Specify whether to allow editing of the document. Select either [Allow] or [None].
|
|
[Copying of Contents]
|
Specify whether to allow copying of the contents of PDF document. Select either [Allow] or [None].
|
|
[Permissions Password to Bypass Restrictions]
|
Enter the password to release print and editing restrictions in the document.
|
|
NOTE
|
|
You can select [High Compression] in the compression settings to create a smaller PDF document.
|
4.
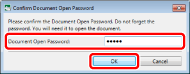
If [Document Open Password] is set, enter the password and then click [OK].
5.
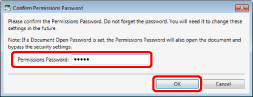
If [Permissions Password] is set, enter the password and then click [OK].
6.
Select a storage location and click [Save].
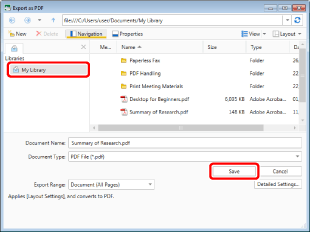
The PDF document is exported to the export destination.
Converting Pages to Images When Converting Documents to a PDF Document
Each page of a document can be converted to an image when converting to a PDF document.
1.
Select the document to convert.
2.
Select [Conversion] on the ribbon > [Set Details and Convert to PDF Document].
[Detailed Settings for PDF Document] is displayed.
3.
Select the [Convert the page contents into an image] check box, and click [OK].
The PDF document with pages converted to images is displayed in the File List View Window.
Configuring Advanced Settings for Converting a Document to a PDF Document
With Desktop, you can convert documents stored in a library to PDF documents. When converting, you can specify advanced settings such as a password for the document.
1.
Select the document to convert.
2.
Select [Conversion] on the ribbon > [Set Details and Convert to PDF Document].
[Detailed Settings for PDF Document] is displayed.
3.
Specify the various settings and then click [OK].
The converted PDF document is displayed in the File List View Window.
Converting to a TIFF Document/JPEG Document
With Desktop, you can convert PDF documents/IWB documents stored in a library to TIFF documents or JPEG documents.
This section describes how to convert PDF documents/IWB documents to JPEG documents.
For information on converting to TIFF documents, see the "User's Guide".
1.
Select the document to convert to a JPEG document.
2.
Select [Conversion] on the ribbon > [Convert to JPEG Document].
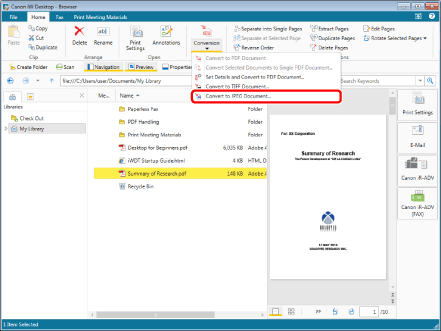
[Convert to JPEG Document] is displayed.
3.
Specify the various settings and then click [OK].
The converted JPEG document is displayed in the File List View Window.