Changing the Overlapping Order of Mail Merge Fields
When you use Desktop Editor to insert or move Mail Merge fields, the Mail Merge fields may overlap. In this case, you can change the overlapping order if necessary.
1.
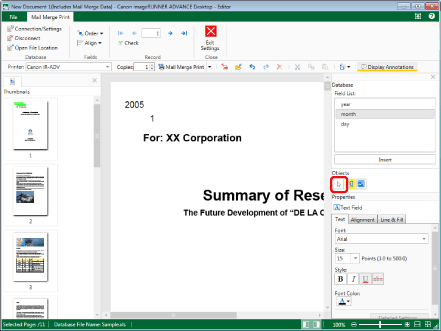
Click  (Select Fields) on the Details Window.

2.
Move the mouse pointer to the Mail Merge field that you want to change the overlapping order of on the Work Window, and click the field when the shape of the mouse pointer changes to  .
.
Or, drag the mouse pointer selection rectangle to include the Mail Merge field to change the overlapping order of.
|
NOTE
|
|
Multiple Mail Merge fields can be selected by clicking them while holding down the [Ctrl] key on the keyboard.
|
3.
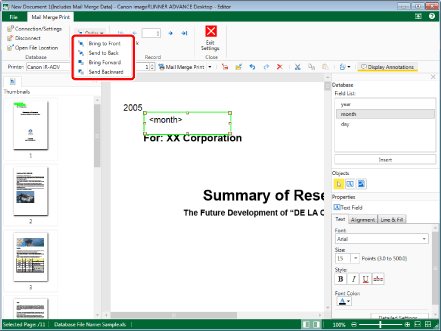
Click [Order] on the ribbon, and select the overlapping order.
You can also right-click an area where the mouse pointer changes to  and select the overlapping order in [Order].
[Bring to Front]: The selected Mail Merge field is brought to the front.
[Send to Back]: The selected Mail Merge field is brought to the back.
[Bring Forward]: The selected Mail Merge field is brought one step forward from its current position.
[Send Backward]: The selected Mail Merge field is brought one step back from its current position.

|
NOTE
|
|
When more than one Mail Merge field is selected, the overlapping order between them is not changed.
|
4.
Click on the Work Window outside the Mail Merge field you changed the overlapping order of to deselect the Mail Merge field.