Registering a Library
This section describes the Desktop library.
Libraries
A library is a location for storing folders and documents. Libraries are like office cabinets. Folders on computers and shared folders on a network, etc. are registered to libraries. Registering only the folders necessary for your work makes data management easier.
You can register up to 100 libraries.

* There are the Document Server Library, SharePoint Server Library, DM Data Library, and Therefore Library as the other types of libraries.
Differences between the Personal Library and Network Library
A Personal Library is a library that you use to manage documents on a local computer. A Network Library is a library that you use to share documents on a network.
Register the library that suits your purpose.
Registering a Personal Library
A Personal Library is a library that you use to manage documents on a local computer. If you do not need to share the documents with other users, register the folders on the local computer as a Personal Library.
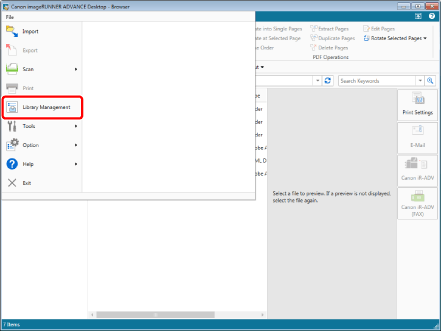
1.
Select the [File] menu > [Library Management].
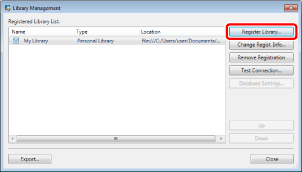
2.
Click [Register Library].
3.
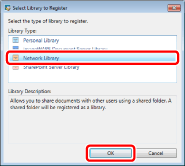
Select [Personal Library] and click [OK].

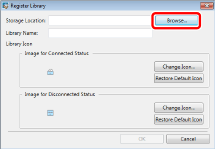
4.
Click [Browse].
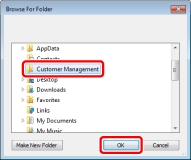
5.
Select the folder to register in the Personal Library and click [OK].
In this example, select the "Customer Management" folder.
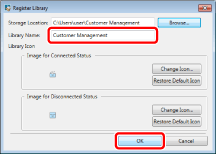
6.
To change [Library Name], set a name of your choice and then click [OK].
|
NOTE
|
|
If a Windows Search confirmation message appears, click [OK].
|
7.
Confirm that the destination has been added to [Registered Library List] and click [Close].
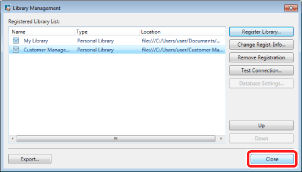
The "Customer Management" folder is registered as a Personal Library.
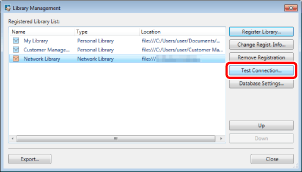
Registering a Network Library
A Network Library is a folder for managing documents on a network. To share documents with other users, register the folder on the network as a Network Library.
1.
Select the [File] menu > [Library Management].
2.
Click [Register Library].
3.
Select [Network Library] and click [OK].
4.
Click [Browse].
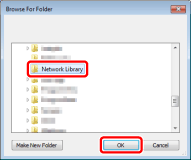
5.
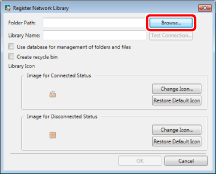
Select a folder to use and click [OK].
6.
To use a database to manage folders and files, select the [Use database for management of folders and files] check box.
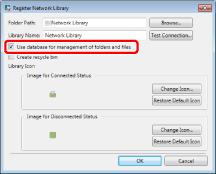
For details on the [Use database for management of folders and files] check box, see the "User's Guide".
7.
To create a Recycle Bin in the Network Library, select the [Create recycle bin] check box.
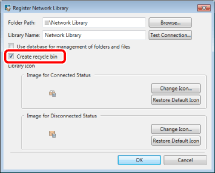
For details on the [Create recycle bin] check box, see the "User's Guide".
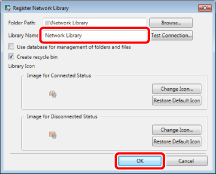
8.
To change the library name, set a name of your choice and click [OK].
9.
Test the connection to the registered library.
|
NOTE
|
|
If [Connect to Library] or the dialog box for authentication is displayed, enter [User Name] and [Password], and click [OK].
|
10.
Click [Close].
The shared folder on the network is registered as a Network Library.