Cleaning the Machine Interior
Clean the interior of the machine regularly so that toner/paper dust does not collect.
1
Turn off the machine and unplug it from the power outlet.
Turning the printer OFF erases any queued print data. Data such as documents received and held in memory, documents waiting to be sent, and reports that are automatically printed after sending or receiving faxes are not deleted.
2
Lift the operation panel.
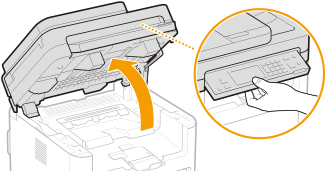

If you cannot lift the operation panel
Make sure the feeder or the platen glass cover is completely closed. If a thick original such as a book is placed on the platen glass, remove the original. Forcing the operation panel up may cause damage.
3
Open the toner cover.
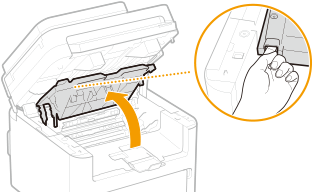
4
Remove the toner cartridge.
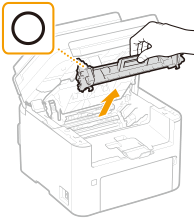

Do not shake or tilt the toner cartridge. Also, make sure to avoid applying shocks to the toner cartridge, such as by hitting it against something. Doing so may cause the toner left in the toner cartridge to leak. Remove the toner cartridge gently at the same angle as the slot.
5
Remove the drum cartridge.
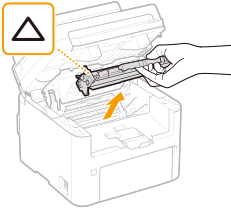

Do not shake or tilt the drum cartridge. Also, make sure to avoid applying shocks to the drum cartridge, such as by hitting it against something. Doing so may cause the toner left in the drum cartridge to leak. Remove the drum cartridge gently at the same angle as the slot.
6
Using a lint-free clean, soft, dry cloth, wipe away toner/paper dust from the inside.
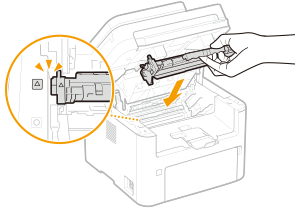
7
Insert the drum cartridge.
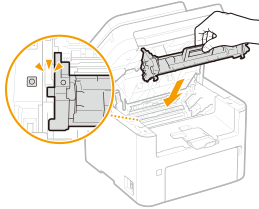
8
Insert the toner cartridge.
9
Close the toner cover.
10
Lower the operation panel.
11
Reconnect the power cord and turn ON the machine.