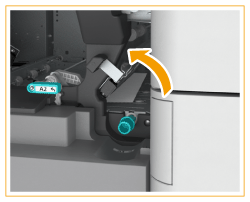
Paper Jams in the Document Insertion Unit-N
Check the location of the paper jam on the touch panel display, and follow the procedure described in this section to clear the paper jam. Paper jam locations are indicated by numbers such as I-I1 or I-A1, which are shown in the illustration below. The Document Insertion Unit-N is optional. Optional Equipment
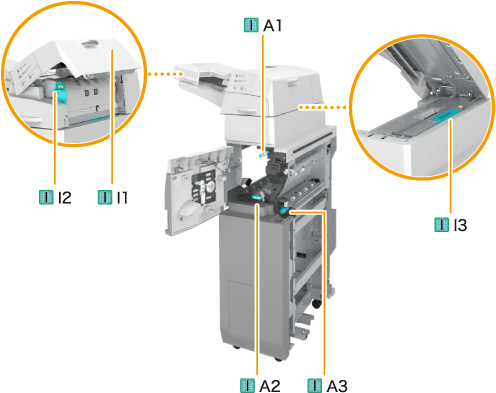
IMPORTANT |
Part of the Document Insertion Unit-N may interfere with the finisher when clearing jams. Lift up the document insertion unit before removing jams from the finisher. |
NOTE |
Confirm before handlingClose any covers that are open. |
1
Remove the paper that is not jammed from the document insertion unit.
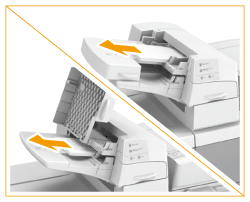
2
Check whether paper is jammed in the upper cover (I-I1) of the document insertion unit.
 | Open the upper cover (I-I1) of the document insertion unit. |
 | If paper is jammed, gently pull it out in the direction of the arrow. 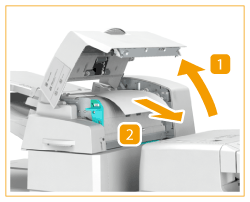 |
3
Check whether paper is jammed in the guide (I-I2).
 | Open the guide (I-I2). |
 | If paper is jammed, gently pull it out in the direction of the arrow. 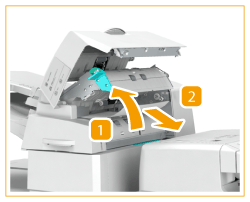 |
4
Close the guide (I-I2) and the upper cover (I-I1).
5
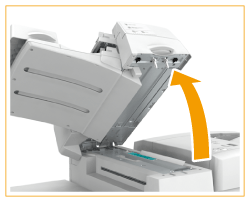
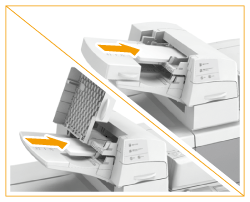
While pressing the handle lever, open the document insertion unit.
6
Check whether paper is jammed in the guide (I-I3).
 | Open the guide (I-I3). |
 | If paper is jammed, gently pull it out in the direction of the arrow. 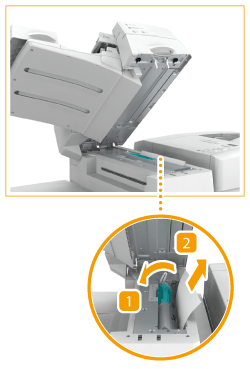 |
7
Close the guide (I-I3) and the document insertion unit.
8
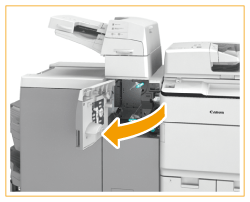
Open the front cover of the document insertion unit.
9
Open the guide (I-A1).
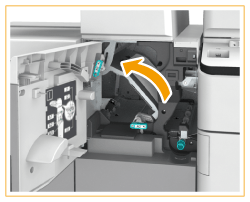
10
Check whether paper is jammed in the guide (I-A1).
 | If paper is jammed, gently pull it out in the direction of the arrow. 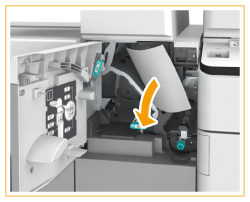 |
 | Close the guide (I-A1). |
11
Open the guide (I-A2).
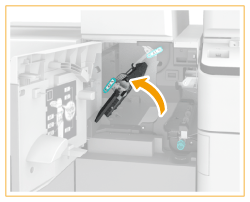
12
Turn the knob (I-A3), and check whether paper is jammed..
 | Turn the knob (I-A3). |
 | If paper is jammed, gently pull it out in the direction of the arrow. 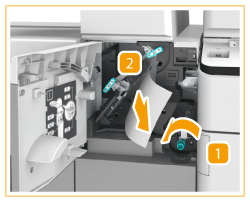 |
13
Close the guide (I-A2) and the front cover.
14
Replace the paper in the document insertion unit.
Continue following the instructions on the screen to proceed with the interrupted operation or continue clearing paper jams.
NOTE:
If the paper jam message is repeatedly displayed, open the entrance guide located above the knob (I-A3) on the inside of the front cover, and check whether or not paper remains.
