Printing Results Are Not Satisfactory
Dirt inside the machine may affect printing results. Perform care and cleaning to the machine first. Regular Cleaning
Smudge Marks Appear on the Bottom Edge of Printouts

 Are you using appropriate paper?
Check the supported paper types and replace with an appropriate type. Also, set the paper size and type correctly.
Available Paper
Loading Paper
Specifying Paper Size and Type
Available Paper
Loading Paper
Specifying Paper Size and Type
 Do you print data without margins?
This symptom occurs if a margin is set to none in the printer driver. A margin of 1/4" (5 mm) or less around the edge of paper or 3/8" (10 mm) or less around the edge of envelopes is not printable with the machine. Make sure to have margins around the document to print.
[Finishing] tab  [Advanced Settings]
  [Expand Print Region and Print]
  [Off]
[Off]
 [Advanced Settings]
  [Expand Print Region and Print]
  [Off]
[Off]Smudges Appear on Printouts

 Are you using appropriate paper?
 Do smudges appear when using the machine in an environment with low humidity?
Change the setting for <Low Humidity Mode>. The improvement effect is stronger with <Mode 2> than <Mode 1>. First try with <Mode 1>.
<Low Humidity Mode>
<Low Humidity Mode>

If <Low Humidity Mode> is specified, print density may be lower or uneven when the machine is used in an environment with high humidity.
 Do smudges appear on printouts depending on the paper type or the operating environment?
Change the setting of <Correct Blurry Image>. The improvement effect is weakest with <Mode 1> and strongest with <Mode 4>. Try the adjustment starting with <Mode 1>.
<Correct Blurry Image>
<Correct Blurry Image>

Setting a stronger improvement effect may result in lighter print density or slower printing speed. It may also result in less sharp edges and rougher details.
If [Barcode Adjustment Mode] in the printer driver is specified, the <Correct Blurry Image> setting is disabled.
 Is the machine installed in an environment where the temperature changes rapidly and drastically?
When the temperature changes rapidly in the environment where the machine is installed, condensation occurs, which may cause fading or bleeding in images and text. If <Control Condensation> is set to <On>, condensation inside the machine will be removed. Condensation removal may be performed automatically due to temperature change.
<Control Condensation>
<Control Condensation>

While condensation removal is being performed, printing may not be performed properly and blank paper may be output.
If you set to <On>, you need to keep the machine turned ON to maintain the effect of condensation removal.
 Do smudges appear on copy job output depending on the paper type or the environmental conditions?
Changing the setting of <Correct Blurry Image for Copy> may solve the problem. The improvement effect is weakest with <Mode 1> and strongest with <Mode 3>.
<Correct Blurry Image for Copy>
<Correct Blurry Image for Copy>

Setting a stronger improvement effect may result in lighter print density.
Afterimages Appear in Blank Areas

 Are you using appropriate paper?
 Do afterimages appear when you print on large size paper after printing on small size paper?
Change the setting for <Reduce Ghosting 1>. Setting to <On> may solve the problem.
<Reduce Ghosting 1>
<Reduce Ghosting 1>

If you set to <On>, the printing speed may be slower.
 Do ghost images appear in the same page?
Change the setting for <High Humidity Mode>. Setting to <On> may solve the problem.
<High Humidity Mode>
<High Humidity Mode>

If you set to <On>, the print density may vary depending on the ambient humidity.
 Is the amount remaining in toner cartridge running low?
Check how much the amount remaining in toner cartridges is left, and replace the toner cartridges as necessary.
Regardless of the displayed toner level, the toner cartridge may have reached the end of its lifetime due to the machine's environmental conditions and the deteriorated materials in the cartridge. Replace the toner cartridge.
Replacing the Toner Cartridge
Replacing the Toner Cartridge
Toner Smudges and Splatters Appear

 Are you using appropriate paper?
 Do toner smudges and splatters appear when using the machine in an environment with low humidity?
Change the setting for <Low Humidity Mode>. The improvement effect is stronger with <Mode 2> than <Mode 1>. First try with <Mode 1>.
<Low Humidity Mode>
<Low Humidity Mode>

If <Low Humidity Mode> is specified, print density may be lower or uneven when the machine is used in an environment with high humidity.
 Is the amount remaining in toner cartridge running low?
Check how much the amount remaining in toner cartridges is left, and replace the toner cartridges as necessary.
Regardless of the displayed toner level, the toner cartridge may have reached the end of its lifetime due to the machine's environmental conditions and the deteriorated materials in the cartridge. Replace the toner cartridge.
Replacing the Toner Cartridge
Replacing the Toner Cartridge
Printouts Are Faded

 Are you using appropriate paper?
Check usable paper, and replace with appropriate paper. Also, specify the paper size and type settings properly.
Available Paper
Loading Paper
Specifying Paper Size and Type
Available Paper
Loading Paper
Specifying Paper Size and Type
 Is the machine installed in an environment where the temperature changes rapidly and drastically?
When the temperature changes rapidly in the environment where the machine is installed, condensation occurs, which may cause fading or bleeding in images and text. If <Control Condensation> is set to <On>, condensation inside the machine will be removed. Condensation removal may be performed automatically due to temperature change.
<Control Condensation>
<Control Condensation>

While condensation removal is being performed, printing may not be performed properly and blank paper may be output.
If you set to <On>, you need to keep the machine turned ON to maintain the effect of condensation removal.
 Are the printouts faded when you print on envelopes?
Printouts may be faded when you print on envelopes with rough surfaces. Setting <Rough Surface Envelope Mode> to <On> may solve the problem.
<Rough Surface Envelope Mode>
<Rough Surface Envelope Mode>

If you set <Rough Surface Envelope Mode> to <On>
The <Paper Curl Correction> setting will be disabled.
The printing speed may be slower.
 Is the amount remaining in toner cartridge running low?
Check how much the amount remaining in toner cartridges is left, and replace the toner cartridges as necessary.
Regardless of the displayed toner level, the toner cartridge may have reached the end of its lifetime due to the machine's environmental conditions and the deteriorated materials in the cartridge. Replace the toner cartridge.
Replacing the Toner Cartridge
Replacing the Toner Cartridge
A Portion of the Page Is Not Printed
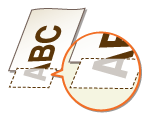
 Do you print data without margins?
This symptom occurs if a margin is set to none in the printer driver. A margin of 1/4" (5 mm) or less around the edge of paper or 3/8" (10 mm) or less around the edge of envelopes is not printable with the machine. Make sure to have margins around the document to print.
[Finishing] tab  [Advanced Settings]
  [Expand Print Region and Print]
  [Off]
[Off]
 [Advanced Settings]
  [Expand Print Region and Print]
  [Off]
[Off] Do the paper guides align with the edges of the paper?
If the paper guides are too loose or too tight, part of a document may not be printed.
Loading Paper
Loading Paper
 Is the machine installed in an environment where the temperature changes rapidly and drastically?
When the temperature changes rapidly in the environment where the machine is installed, condensation occurs, which may cause fading or bleeding in images and text. If <Control Condensation> is set to <On>, condensation inside the machine will be removed. Condensation removal may be performed automatically due to temperature change.
<Control Condensation>
<Control Condensation>

While condensation removal is being performed, printing may not be performed properly and blank paper may be output.
If you set to <On>, you need to keep the machine turned ON to maintain the effect of condensation removal.
Streaks Appear/Printing is Uneven

 Are you using appropriate paper?
 Is the platen glass dirty?
Clean the platen glass and the underside of the feeder.
Cleaning the Platen Glass
Cleaning the Platen Glass
 Have you cleaned the fixing unit?
Clean the fixing unit.
Cleaning the Fixing Assembly
Cleaning the Fixing Assembly
 Is the machine installed in an environment where the temperature changes rapidly and drastically?
When the temperature changes rapidly in the environment where the machine is installed, condensation occurs, which may cause fading or bleeding in images and text. If <Control Condensation> is set to <On>, condensation inside the machine will be removed. Condensation removal may be performed automatically due to temperature change.
<Control Condensation>
<Control Condensation>

While condensation removal is being performed, printing may not be performed properly and blank paper may be output.
If you set to <On>, you need to keep the machine turned ON to maintain the effect of condensation removal.
 Do black horizontal streaks appear in the leading edge of paper?
Change the setting of <Rdc. Wrinkles(Humidity)/Streaks>. Setting to <On> may solve the problem.
<Rdc. Wrinkles(Humidity)/Streaks>
<Rdc. Wrinkles(Humidity)/Streaks>

If you set to <On>, the printing speed will be slower.
 Is the amount remaining in toner cartridge running low?
Check how much the amount remaining in toner cartridges is left, and replace the toner cartridges as necessary.
Regardless of the displayed toner level, the toner cartridge may have reached the end of its lifetime due to the machine's environmental conditions and the deteriorated materials in the cartridge. Replace the toner cartridge.
Replacing the Toner Cartridge
Replacing the Toner Cartridge
Printouts Are Grayish
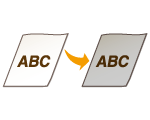
 Does the original have background color, is it stained, or are you copying an original such as a newspaper that is printed on thin paper so that text or images on the other side are visible through the paper?
Check the original and then adjust the density to the correct settings.
Basic Copy Operations
Basic Copy Operations
 Does the white background become dark?
Change the <Background Density> setting. Changing the <Adjust (Manual)> setting may solve the problem.
Basic Copy Operations
Basic Copy Operations

Depending on the original color, portions other than the background may be affected.
 Is the machine installed in the appropriate environment?
Install the machine in an appropriate location.
Relocating the Machine
Relocating the Machine
Store the toner cartridge in an appropriate location for two to three hours, then try printing again. This may solve the problem. If the problem persists, replace the toner cartridge.
Replacing the Toner Cartridge
Replacing the Toner Cartridge
White Spots Appear

 Are you using paper that has absorbed moisture?
Replace with appropriate paper.
Loading Paper
Loading Paper
 Are you using appropriate paper?
 Does a void appear at the center of dark text or lines?
Change the setting for <High Humidity Mode>. Setting to <On> may solve the problem.
<High Humidity Mode>
<High Humidity Mode>

If you set to <On>, the print density may vary depending on the ambient humidity.
 Is the machine installed in an environment where the temperature changes rapidly and drastically?
When the temperature changes rapidly in the environment where the machine is installed, condensation occurs, which may cause fading or bleeding in images and text. If <Control Condensation> is set to <On>, condensation inside the machine will be removed. Condensation removal may be performed automatically due to temperature change.
<Control Condensation>
<Control Condensation>

While condensation removal is being performed, printing may not be performed properly and blank paper may be output.
If you set to <On>, you need to keep the machine turned ON to maintain the effect of condensation removal.
 Are you using the machine in an environment with high humidity?
Change the setting for <High Humidity Mode>. Setting to <On> may solve the problem.
<High Humidity Mode>
<High Humidity Mode>

If you set to <On>, the print density may vary depending on the ambient humidity.
 Is the amount remaining in toner cartridge running low?
Check how much the amount remaining in toner cartridges is left, and replace the toner cartridges as necessary.
Regardless of the displayed toner level, the toner cartridge may have reached the end of its lifetime due to the machine's environmental conditions and the deteriorated materials in the cartridge. Replace the toner cartridge.
Replacing the Toner Cartridge
Replacing the Toner Cartridge
Black Spots Appear
Reverse Side of Paper is Smudged

 Have you loaded paper that is smaller than the size of the print data?
Check to make sure that the paper size matches the size of the print data.
 Have you cleaned the fixing unit?
Clean the fixing unit.
Cleaning the Fixing Assembly
Cleaning the Fixing Assembly
Printed Barcode Cannot Be Read
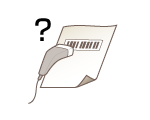
 Are you using a small barcode or a barcode consisting of thick lines?
Enlarge the barcode.
If the direction of lines in the barcode is perpendicular to the paper output direction, turn the image 90 degrees to make the lines parallel to the paper output direction.
If the problem persists even after performing the above operation, change the mode by using [Barcode Adjustment Mode] in the printer driver. The improvement effect is weakest with [Mode 1] and strongest with [Mode 5]. Try the adjustment starting with [Mode 1].
[Finishing] tab  [Advanced Settings]
  [Barcode Adjustment Mode]
  Select the mode
 [Advanced Settings]
  [Barcode Adjustment Mode]
  Select the mode
If the improvement effect is stronger, the print density becomes lighter.
[Barcode Adjustment Mode] may not be displayed depending on the printer driver settings. For information about how to display it, see the manuals for the relevant drivers on the online manual website.
If [Barcode Adjustment Mode] is specified, the <Correct Blurry Image> setting is disabled. In addition, specifying [Mode 4] or [Mode 5] results in slower printing.
