Printing a Sample
This mode enables you to check the print result and the content of the image before making multiple print.
IMPORTANT |
This mode can be used only for printing a file stored in a mail box. [Print Sample] appears only if you set to make multiple prints of your original with [Collate (Page Order)], [Offset], [Rotate 90 Degrees], [Staple], [Add Cover], [Insert Sheets], [Print on Tab], or [Booklet]. |
1.
Press  → [Access Stored Files] → [Mail Box].
→ [Access Stored Files] → [Mail Box]. 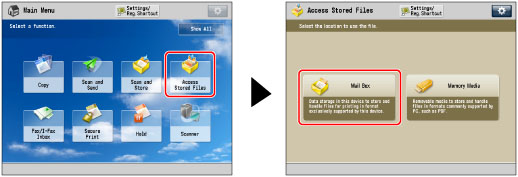
2.
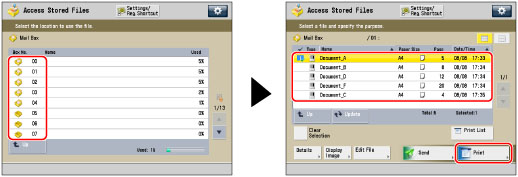
Select the desired Mail Box → select the desired file → press [Print].
3.
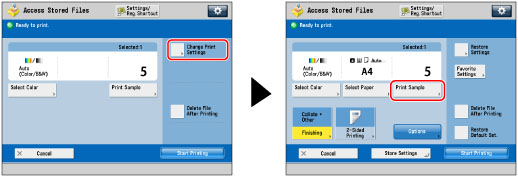
Press [Change Print Settings] → [Print Sample].
4.
Select the pages to print as a sample.
If you select [All Pages]:
Press [All Pages].
Press [OK].
If you select [Specified Pages]:
Press [Specified Pages].
Press [First Page] and [Last Page] → press [-] or [+] to set their respective page numbers.
Press [OK].
5.
Press [Start Printing].
Check the content of the output.
IMPORTANT |
The following restrictions apply when specifying pages: Make sure to specify page numbers based on the output. Note that the page numbers of the output may be different from those of the original. If you select [Specified Pages], the Staple, Hole Punch, Fold Type, Booklet, or Trim mode cannot be set. You cannot change the specified page numbers after the print sample is output. You cannot change [All Pages] to [Specified Pages] or vice versa after the print sample is output. |
6.
Select the desired operation.
To make the remaining prints, press [Start Printing].
To change the settings, press [Change Settings]. Select the mode to change → change the settings → press [OK].
If you want to check the changes that you have made, press [Print Sample] → repeat the procedure from step 2.
If you change settings and then press [Start Printing], the machine prints from the first set with the new settings.
To cancel printing, press [Cancel].