Registering/Editing Custom Paper Types
You can register up to 200 custom paper types, besides the default paper types registered in the machine.
To Register Custom Paper Types (Duplication)
You can easily register a new paper type by duplicating an already registered paper type with similar properties, and giving it a new name.
1.
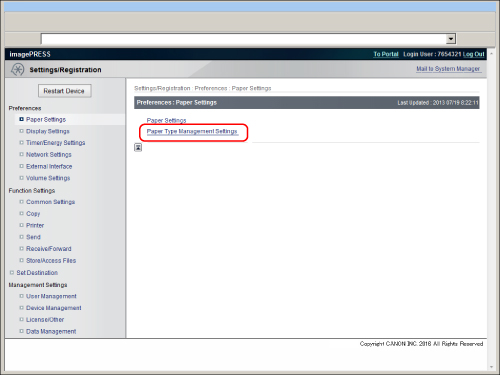
Click [Settings/Registration] → select [Paper Settings] for <Preferences> → click [Paper Type Management Settings].
2.
Select the paper type that has the properties closest to the paper type that you want to register → click [Duplicate...].
NOTE |
You can use the drop-down lists to sort the list according to where the paper types are registered or how much the paper types weigh. You can click the name of a paper type to display detailed information for the paper type. The setting does not appear on the Remote UI, even if [Change Default Display for Paper Type List] is set for [Preferences](Settings/Registration). The default setting is [Reg'd (Desc.)]. |
3.
Enter a name for the paper type → click [OK].
IMPORTANT |
The paper type name cannot be registered in the following cases: If the name is the same as the duplicated paper type If the name is left blank |
4.
Click the name of the paper type that you registered in the list → click [Edit...].
5.
Specify the desired settings → click [OK].
To Edit Custom Paper Types
1.
Click [Settings/Registration] → select [Paper Settings] for <Preferences> → click [Paper Type Management Settings].
2.
Follow the procedure in steps 4 to 5 of "To Register Custom Paper Types (Duplication)" to edit the custom paper type settings.
IMPORTANT |
Only custom paper types registered by the current user can be edited. |
To Delete Custom Paper Types
1.
Click [Settings/Registration] → select [Paper Settings] for <Preferences> → click [Paper Type Management Settings].
2.
Click [Delete] for each paper type you want to delete → [OK].
IMPORTANT |
Only custom paper types registered by the current user can be erased. |