File Name
You can set a file name to use when sending a document to an e-mail, I-fax, file server. or mail box destination. If you do not specify a file name, it will be specified automatically.
1.
Press  → [Scan and Send].
→ [Scan and Send].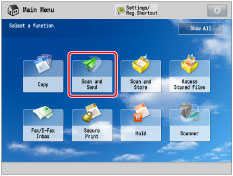
2.
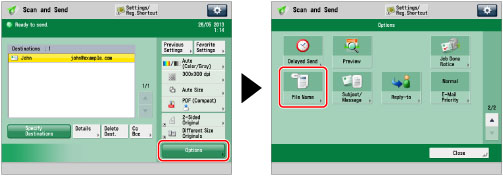
Specify the destination → press [Options] → [File Name].
3.
Press [File Name].
4.
Enter a file name → press [OK] → [OK].
If you are sending to an e-mail address or file server, specify [Auto (OCR)] as necessary.
If you set [OCR (Text Searchable)] for [PDF], [XPS], [OOXML] as the file format, you can set [Auto (OCR)] to 'On' to automatically name the file with extracting first text block which is detected as the document title. You can set the number of characters that are extracted for [Auto (OCR)] in <No. of OCR File Name Characters> in OCR (Text Searchable) Settings. (See "Settings for Creating Searchable PDF/XPS/OOXML.")
IMPORTANT |
The desired text block may not be set as the file name depending on the layout of the document, etc. Characters, such as commas (,), slashes (/), or brackets ([,]) are invalid when sending a file and will not be extracted as the file name. If you have already entered a document name, the extracted text block is appended to the end of the file name. Characters over the character limit will be cut off. You cannot set the encrypted PDF mode and [Auto (OCR)] at the same time. |
NOTE |
When you send documents via e-mail or I-fax, each page is sent as a separate image attached to an e-mail message or a separate TIFF image attached to an I-fax. The file extension for the document matches the file format that you select for sending. The file name is assigned as follows: If you set the file name: The file name is composed of the file name as entered, plus three digits that represent the page number of the image. Example: file name_002.tif If you do not set the file name: The file name is composed of the job number (0001 to 4999), plus three digits that represent the page number of the image. Example: 1231_002.tif When you send documents to a file server, each page is sent and stored as a separate image. The file extension for the document matches the file format that you select for sending. The file name is assigned as follows: If you set the file name: If you Divide into Pages: The file name is composed of the file name as entered, the year, month, day, hour, minute, and second the file is sent, and five digits that represent the page number of the image. Examples: file name_20160707203000_00002.tif file name_20160707203000_00002.jpg file name_20160707203000_00002.pdf file name_20160707203000_00002.xps If you do not Divide into Pages: The file name prefix is generated by the file name and the year, month, day, hour, minute, and second the file is sent. Examples: file name_20160707203000.tif file name_20160707203000.pdf file name_20160707203000.xps If you do not set the file name: If you Divide into Pages: The file name prefix is generated by the year, month, day, hour, minute, and second the file is sent, and the five digits that signify the page number of the image. Examples: 20160707203000_00002.tif 20160707203000_00002.jpg 20160707203000_00002.pdf 20160707203000_00002.xps If you do not Divide into Pages: The file name is composed of the year, month, day, hour, minute, and second the file is sent. Examples: 20160707203000.tif 20160707203000.pdf 20160707203000.xps You can specify a file name using the Remote UI when sending to an e-mail/I-fax address or a server that is stored in [Favorite Settings]. (See "Specifying a File Name for Transmission to a Destination in Favorite Settings.") |
5.
Press [Close].
IMPORTANT |
If you use characters such as backslashes (\), slashes (/), colons (:), asterisks (*), question marks (?), double quotation marks ("), open angle brackets (<), close angle brackets (>), and vertical bars (|) in the document name, you are unable to send the file to file servers that run on operating systems that do not recognize such characters. |