Registering an I-Fax Address
You can store the I-fax address, the mode, and the destination conditions.
1.
Press  → [Scan and Send] → [Address Book].
→ [Scan and Send] → [Address Book].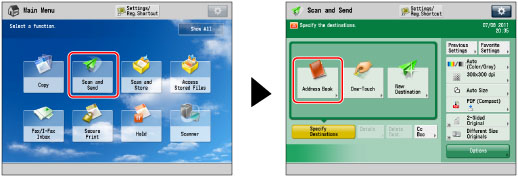
2.
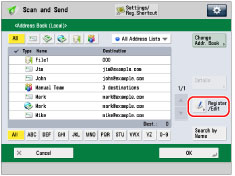
Press [Register/Edit].
3.
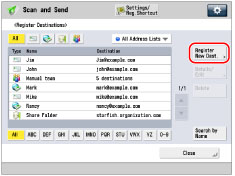
Press [Register New Dest.].
4.
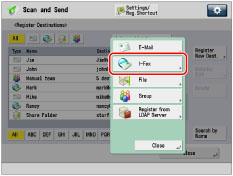
Press [I-Fax].
5.
Press [Name].
6.
Enter a name for the destination → press [OK].
The registered name is used as the display name of the e-mail address.
NOTE |
The first character that you enter for the name is used for sorting the destination list when you press keys, such as [ABC], [DEF], and [GHI], on the Address Book screen. If [Search by Name] is pressed on the Address Book screen, a screen for narrowing the search in the Address Book appears. |
7.
Press the drop-down list → select an address list from Address List 1 to 10.
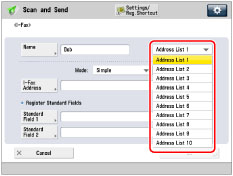
Address lists are a convenient way to classify destinations.
8.
Press the <Mode:> drop-down list → select the desired mode.
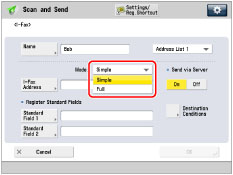
For details on the settings, see step 3 of "Specifying Destinations by Entering an I-Fax Address."
9.
Press [I-Fax Address].
10.
Enter the I-fax address → press [OK].
NOTE |
If you do not send documents via a server, and if the recipient's IP address is not registered with a DNS server, enter the domain name in the following format: (user) @ (the recipient's IP address). |
11.
Specify the setting for <Send via Server> as necessary.
Set [Standard Field 1] and [Standard Field 2], as necessary.
Standard Field 1 and Standard Field 2 are settings required for using an Internet fax service. For details, contact your service provider.
NOTE |
After you press [OK], the standard field that you entered appears as asterisks (********) on the I-fax settings screen. |
For more information on sending via a server, see step 8 of "Specifying Destinations by Entering an I-Fax Address."
12.
Press [Destination Conditions].
13.
Set the destination conditions → press [OK].
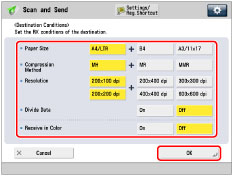
<Paper Size>: | Set the paper size to send with. A5 is included in [A4/LTR]. |
<Compression Method>: | MH (Modified Huffman): This method scans and compresses extended areas of white and black dots. MR (Modified Read): This method scans and compresses extended areas of white and black dots. Faster than MH. MMR (Modified Modified Read): This method is an adaptation of Modified Read, originally for use in digital machines. Faster than MR. |
<Resolution>: | Set the resolution that the recipient can receive. |
<Divide Data>: | Select [On] if the recipient's machine has a function to combine divided data that is received, or [Off] if it does not. If the size of the data being sent exceeds the value set for [Maximum Data Size for Sending], the data is divided when sent. If the size of the data being sent exceeds the value set for [Maximum Data Size for Sending] when [Off] is selected, a sending error occurs. For instructions on setting the maximum data size for sending, see "Maximum Data Size for Send." |
<Receive in Color>: | Specify whether the destination supports to receive in color or not. If the destination supports to receive in color, press [On] → [Next] → set the paper size and resolution. If the destination does not support to receive in color, press [Off] → set the paper size, compression method, and resolution. |
IMPORTANT |
Set the destination conditions according to the specifications of the recipient's machine. If you set conditions that the recipient's machine does not support, a transmission error may occur. |
14.
Press [OK].
If you are managing Address Book access numbers, perform the procedure in step 11 of "Registering an E-Mail Address."
15.
Press [Close] → [OK].