Specifying a Destination by Entering an E-mail Address
1.
Press  → [Scan and Send] → [New Destination].
→ [Scan and Send] → [New Destination].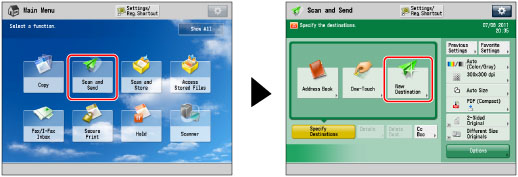
2.
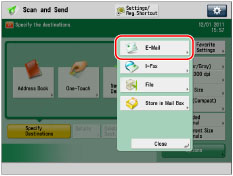
Press [E-Mail].
3.
Enter the e-mail address → press [OK].
If [Auto Complete for Entering E-Mail Addresses] is set to 'Off', press [E-Mail Address] → enter the e-mail address.
NOTE |
You can use the autocomplete function, if you set [Auto Complete for Entering E-Mail Addresses] to 'On'. (See "Setting Auto Complete for E-mail Address Entry.") When you enter an e-mail address from the keyboard displayed on the touch panel display, e-mail addresses registered in the Local Address Book that match the initial characters of your e-mail address entry, automatically appear highlighted yellow. To select the automatically displayed e-mail address, press [OK]. To enter a different e-mail address, enter the full destination address. You can also specify a destination by pressing  to display a list of potential matches. to display a list of potential matches. E-mail addresses that are stored with an access number do not appear. |
4.
Select one of the following for <Divide Data>.
[On]: | Select [On] if the recipient's machine has a function to combine divided data that is received. |
[Off]: | Select [Off] if the recipient's machine does not have a function to combine divided data or if you do not want to divide the sent data. |
If the size of the data being sent exceeds the value set for [Maximum Data Size for Sending], the data is divided when sent. If the size of the data being sent exceeds the value set for [Maximum Data Size for Sending] when the Divide Data setting is set to 'Off', the data is divided by pages and sent as multiple e-mails. (See "Maximum Data Size for Send.")
IMPORTANT |
Make sure to check the specifications of the destination's e-mail software before setting this mode. If you set conditions that the recipient's machine does not support, a transmission error may occur. |
To add another destination, press [Next Destination] → repeat steps 3 and 4.
5.
Press [OK].