
Adjusting Gradation
0UUY-0J6 0UW1-0HR 0YRY-0HL 0X7F-0L6 0X7H-0KR 1100-0HU 0X6E-0L6 0X6W-0KR 10XJ-0HU 0X7C-0L6 0X7A-0KR 1106-0HU 0WXY-0L7 0X7E-0KR 10YY-0HU 10H3-0HR 0WR6-0LC 0WR7-0KY 108A-0HS 1116-0HS 10H4-0HR 0WR5-0LC 0WR8-0KY 0YWJ-0JK 0YWH-0KR 0YWR-0JC 0YWK-0KR 0YWE-0L6 0YWF-0KR 0YAS-0HU
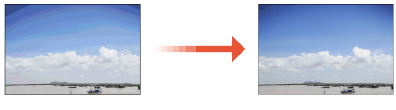
If gradation reproducibility has become so poor that the gradation in the printed or copied image differs markedly from the print data or original document, gradation adjustment may improve the problem.
|
You can use the following paper sizes/types. Size: A4, LTR Type: Plain, Heavy |
 |
Adjustments may not be performed effectively if there is not sufficient toner. |
1
Press  (Settings/Registration)
  <Adjustment/Maintenance> <Adjust Image Quality> <Auto Adjust Gradation>.
(Settings/Registration) 2
Select the paper source where plain paper or heavy paper is loaded, and press <OK>.
3
Press <Start Printing>.
A test page is printed.
The test page refers to a sheet of paper with black stripes printed, which you use in the following steps.
4
Place the test page on the platen glass.
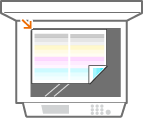
Place the test page so that the side with the printed stripes is face down and the stripes on the page are located on the far side of the machine.
5
Close the feeder and press <Start Scanning>.
The machine starts scanning the test page.
6
Open the feeder, and remove the test page.
7
Repeat steps 3 to 6.
To complete the adjustment, print the test page three times, and scan it each time it is printed.