
Printing from a USB Memory Device (Memory Media Print)
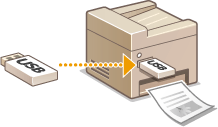
You can print files directly by connecting a USB memory device to the machine. Using this function, you can print without using a computer. For more information about the available USB memory devices and how to insert/remove the USB memory device, see Using a USB Memory Device.
 |
It is necessary to set <Use Print Function> to <On>. <Memory Media Settings> |
1
Select <Memory Media Print> in the Home screen. Home Screen
2
Select the check box for the file to print.
You can select multiple files.
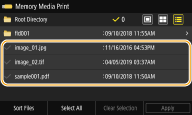
To clear a selection, select the file you have selected ( ) again.
 ) again.
Selecting a folder displays its contents. To return to the folder in the upper level, select  .
.
 .
.
Folders and files in a level deeper than the fifth directory are not displayed.
When you move to another folder, the previous file selections will be cleared.
 To select all files
1 | Select <Select All>. To clear all selections, select <Clear Selection>. |
2 | If file types are mixed, select <JPEG/TIFF Files> or <PDF Files>. |
 To change the file display method
You can select the file display method from "Preview"/"Thumbnail"/"Details."
Preview 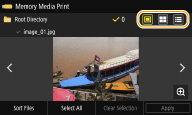 | Thumbnail 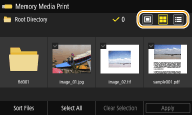 | Details 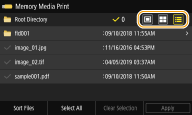 |

You can specify the file display method used to display the <Memory Media Print> screen. <Default Display Settings>
 To change the file sort order
You can change the sort order of the files in a USB memory device.

You can specify a sort setting such as <Name (Ascending)> or <Date/Time (Ascending)> as the default setting for the file sort order. <File Sort Default Settings>
1 | Select <Sort Files>. |
2 | Select the criteria for file sorting.  When you select <Date/Time (Ascending)> or <Date/Time (Descending)>, files are sorted based on the modification dates and time of the files. |
3
Select <Apply>.
4
Specify the print settings as necessary.
You can select <Reset> to restore all the default print settings.
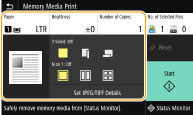
<Paper>
Select the paper source that contains the paper to use for printing.
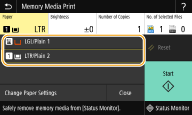
 | Uses the paper that is loaded in the multi-purpose tray to print files. |
 | Uses the paper that is loaded in the paper drawer (Drawer 1) of the machine to print files. |
 When the optional cassette feeding module is installed, its paper drawer is also displayed. When specifying other print settings, select <Close>. |
<Brightness>
<Brightness> is not available for printing PDF files.
You can adjust the brightness of images.
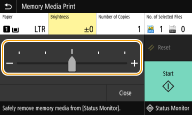
 When specifying other print settings, select <Close>. |
<Number of Copies>
Enter the number of copies.
 When specifying other print settings, select <Close>. |
<2-Sided Printing> 
You can select 1-sided printing or 2-sided printing.
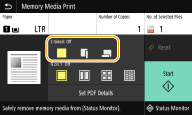
 | Prints on one side of paper. |
 | Prints on both sides of paper in such a way that the printed pages are opened horizontally when bound.  |
 | Prints on both sides of paper in such a way that the printed pages are opened vertically when bound.  |
 <2-Sided Printing> may not be available with some sizes or types of paper. Available Paper |
<N on 1> 
<N on 1> is not available for printing TIFF files.
You can select an "N on 1" pattern to print multiple pages of image data on one side of a sheet of paper.
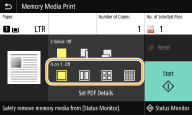
 | Does not apply N on 1. |
 | Prints two pages of image data on one side of a sheet of paper. |
 | Prints four pages of image data on one side of a sheet of paper. |
 (PDF only) | Prints eight pages of image data on one side of a sheet of paper. |
 For a PDF file, you can print 9 or 16 pages of image data on one side of a sheet of paper by using <N on 1> under <Set PDF Details>. |
<Set JPEG/TIFF Details> 
You can change the print settings for JPEG and TIFF images.
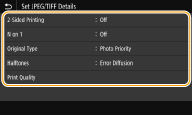
<2-Sided Printing> You can make 2-sided printouts. Select the binding position. |
<N on 1> (JPEG files only) Prints data for multiple pages of image data on the same side of a sheet of paper. You can specify the number of pages to print on one side of a sheet of paper. For example, to print four pages on one side of a sheet of paper, select <4 on 1>. |
<Original Type> You can select the type of original depending on the image to print. 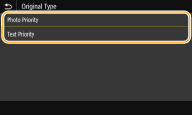 <Photo Priority> Gives priority to printing photo images smoothly. <Text Priority> Gives priority to printing text clearly. |
<Halftones> You can select the printing method used to reproduce halftones (the intermediate range between the lighter and darker areas of an image) for optimal image quality. 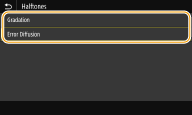 <Gradation> Prints images with fine gradation, such as digital camera images, with a smooth finish. <Error Diffusion> This mode is suitable for printing data with text and thin lines and the curved lines of CAD data, etc.  The stability of the texture and fixed toner may be reduced when <Error Diffusion> is used. |
<Print Quality> You can change settings related to print quality. 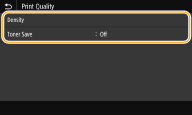 <Density> Adjusts the density for printing. <Toner Save> Selecting <On> prints in toner saving mode. Select <On> when you want to check the layout or other appearance characteristics before proceeding to final printing of a large job.  When <Toner Save> is set to <On>, <Density> is not available. |
<Set PDF Details>
You can change the print settings for PDFs.
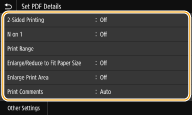
<2-Sided Printing> You can make 2-sided printouts. Select the binding position. |
<N on 1> Prints data for multiple pages of image data on the same side of a sheet of paper. You can specify the number of pages to print on one side of a sheet of paper. For example, to print four pages on one side of a sheet of paper, select <4 on 1>. |
<Print Range> Specify pages you want to print. 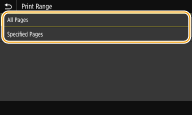 <All Pages> Prints all pages. <Specified Pages> Specify the range of pages you want to print. Enter the desired value in each of <Start Page> and <End Page>, and select <Apply>.  When the specified page range does not match any of the pages of the PDF file, printing is not performed. |
<Enlarge/Reduce to Fit Paper Size> Specify whether to enlarge or reduce the original according to the print range of paper. Note that size enlargement/reduction will not affect the aspect ratio of the original. |
<Enlarge Print Area> Specify whether to extend the print range to the paper size.  If you set to <On>, part of print data may not be printed in edge areas or paper may be partly smudged depending on the document. |
<Print Comments> This setting specifies whether to print annotations in the PDF file. 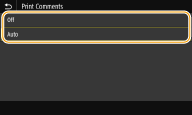 <Off> Prints no annotations. <Auto> Prints only those annotations that are specified to be printed in the PDF file. |
<Password to Open Document> You can print password protected PDF files by entering the password required to open them. Enter the password, and select <Apply>. |
<Other Settings> |
<Halftones>
You can select the printing method used to reproduce halftones (the intermediate range between the lighter and darker areas of an image) for optimal image quality. You can make this setting for each of the types of image contained in one document. See <Halftones> for the description of the setting.
<Grayscale Conversion>
Specify the way of printing color data in black and white. See <Grayscale Conversion> for the description of the setting.
<Print Quality>
<Density>
Adjust the toner density to be used for printing. See <Density> for the description of the setting.
<Toner Save>
Selecting <On> prints in toner saving mode. Select <On> when you want to check the layout or other appearance characteristics before proceeding to final printing of a large job. See <Toner Save> for the description of the setting.
<Image Refinement>
Enable or disable the smoothing mode in which the edges of characters and graphics are smoothly printed. See <Image Refinement> for the description of the setting.
<Resolution>
Specify the resolution to process print data. See <Resolution> for the description of the setting.
5
Select <Start>.
Printing starts.
If you want to cancel printing, select <Cancel>  <Yes>.
 <Yes>.
 |
If you always want to print with the same settings: Memory Media Print |