Editing the Settings of Each Partition
This section describes how to edit a job ticket that applies to certain pages of a job (partition).
You cannot change the Output Method settings separately for each page range. Output Method settings are applied to the whole job.
IMPORTANT |
This mode cannot be used with jobs without a job ticket. |
1.
Press  → [Hold].
→ [Hold].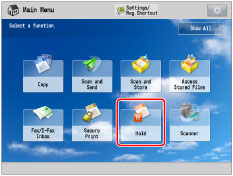
2.
Select the desired job → press [Details/Edit] → [Edit/Confirm Job Ticket].

3.
Select the desired page range → press [Edit] under <Settings for Each Partition>.

If there are three or more stored page ranges, you can scroll through the list by pressing [ ] or [
 ].
].
] or [].You can select up to 100 page ranges.
NOTE |
You can cancel a selection by selecting the page range again. To cancel all page ranges, press [Clear Selection]. (When there are no selected page ranges, [Clear Selection] changes to [Select All].) |
4.
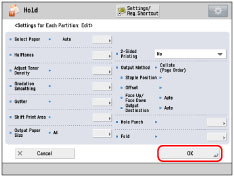
Specify each setting → press [OK].
NOTE |
If multiple page ranges are selected and the settings of each page range are different, [Mixed] is displayed for [Output Paper Size], and [Each Partition] or [Apply Settings for Each Partition] is displayed for the other settings. |
If you want to set the paper source:
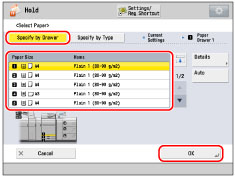
Press [Select Paper].
If you specify the paper from the paper source, press [Specify by Drawer] → select the paper source → press [OK].
NOTE |
If you press [Details], the detailed information of the selected paper is displayed. If you press  , you can switch whether to display the device illustration. For more information, see "Zmiana wyświetlacza domyślnego ekranu z listą wyboru papieru." , you can switch whether to display the device illustration. For more information, see "Zmiana wyświetlacza domyślnego ekranu z listą wyboru papieru." |
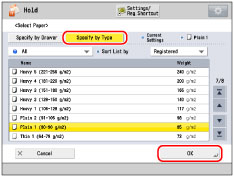
If you specify the paper from the paper type, press [Specify by Type] → select the paper from the list → press [OK].
NOTE | ||||||||||
The meanings of the icons that appear on the left side of each paper type are described below:
You can select a paper type to display from the paper type selection dropdown list.
You can sort the paper type list by the registration date ([Registered]), name ([Name]) or basis weight ([Weight]). |
 :
: :
:If you want to set the halftone:
Press [Halftones].
Select the desired halftone mode.
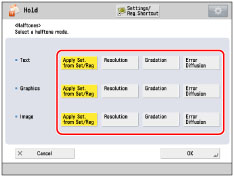
You can specify the halftone mode for text, graphic, and image data, respectively.
[Resolution]: | You can print files with the contours of text data and other fine lines clearly reproduced. This mode is optimal for printing data containing a lot of text or fine lines. |
[Gradation]: | This mode enables you to print in even finer detail than the Resolution mode. You may however experience a slight drop in the integrity of the image quality. You can adjust this setting to smoothly print shapes and graphs using gradation. |
[Error Diffusion]: | This mode is optimal for printing text or very fine lines and for printing contours in CAD data. |
NOTE |
If you use the [Error Diffusion] mode, the stability of a fixed toner (the image quality) may decrease. |
Press [OK].
If you want to set the toner density:
Press [Adjust Toner Density].
Press [-] or [+] to adjust the toner density for yellow, magenta, cyan, and black.
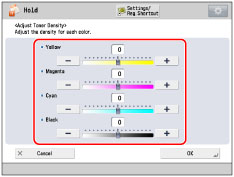
This mode is not available if you set Toner Save mode to 'On'.
You can adjust the print density of yellow, magenta, cyan, and black to any level on a scale of -8 to 8. The default setting is 0 (middle level).
Pressing [+] makes the print image darker, pressing [-] makes the image lighter.
Press [OK].
If you want to set the gradation smoothing:
Press [Gradation Smoothing].
Select the desired settings for the gradation smoothing.
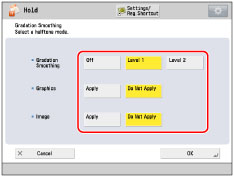
[Apply] in [Graphics] and [Image] are only displayed when [Level 1] or [Level 2] is selected.
Set this function when the gradation of graphics (illustrations made by software applications) or images (bitmap images) is not printed smoothly (the color changes stand out).
[Level 2] performs a smoother gradation than [Level 1]. If [Level 1] is selected and gradation is still not printed smoothly, select [Level 2].
You can select whether to apply smoothing to graphics or image data.
Press [OK].
If you want to set the margin:
Press [Gutter].
Select the desired margin type.
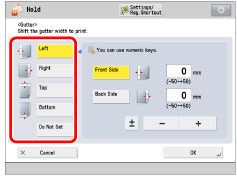
Select [Front Side] or [Back Side] → press [-] or [+] to set the margin width → press [OK].
NOTE | ||||
If you enter a value other than 0, you can switch between the positive and negative margin widths by pressing [±].
|
If you want to shift the print area:
Press [Shift Print Area].
Press [Set] under <Front Side> or <Back Side>.
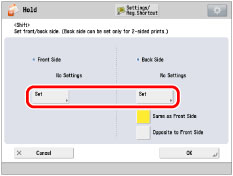
Enter the shift position using  -
-  (numeric keys) → press [OK].
- (numeric keys) → press [OK].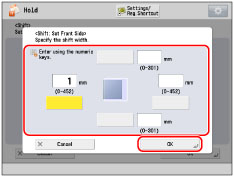
Press [OK].
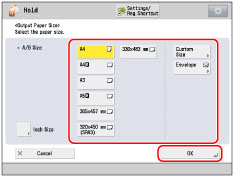
If you want to set the output paper size:
Press [Output Paper Size].
Select the desired paper size → press [OK].
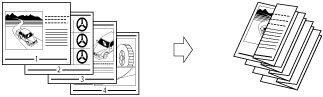
If you want to set the punch mode:
Press [Hole Punch].
Specify the position of the punch holes (left/right).
Select whether to punch → press [OK].
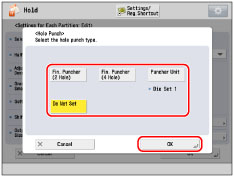
The machine punches two or more holes in the output. You can also choose the position of the punch holes (left/right). However, the number of holes that can be punched varies depending on the type of puncher unit of the attached finisher.
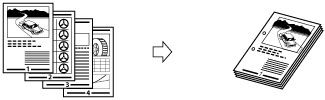
If you want to set the fold mode:
Press [Fold].
Select the folding type → press [OK].
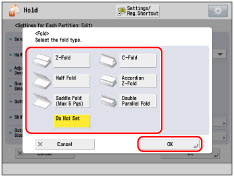
Z-Fold: | The machine Z-folds A3 or A4R paper into A4 or A5 size, respectively. If you specify the Z-Fold mode with the Staple mode, and the number of sheets that are Z-folded exceeds 10, the prints will be collated, but not stapled. |
C-Fold: | The A4R paper is folded three times in a C-fold. If you want the printed side to be folded inside, select [Up (Reverse Order)] for [Face Up/Face Down]. |
Half Fold: | The machine folds A4R paper into A5 size. |

Accordion Z-Fold: | The A4R paper is folded outward three times. If you want the printed side to be folded inside, select [Up (Reverse Order)] for [Face Up/Face Down]. |
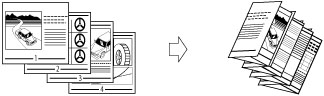
Saddle Fold:
If the Booklet Finisher-W PRO is attached, a maximum of five sheets can be saddle folded together, and then output.
If the Booklet Finisher-AC is attached, 1 to 3 sheets of paper is saddle folded at a time, and then output.
IMPORTANT |
The Saddle Stitch mode can be set only if the 2-Sided Printing mode is set. If the Booklet Finisher-W PRO is attached, the following paper sizes can be saddle folded: 330 mm x 483 mm, 305 mm x 457 mm, 320 mm x 450 mm (SRA3), A3, B4, A4R, 13" x 19", 12" x 18", 12 5/8" x 17 11/16", 11" x 17", LGL, LTRR, or custom size (210 mm x 279.4 mm to 330.2 mm x 487.7 mm (8 1/4" x 11" to 13" x 19 1/4")) If the Booklet Finisher-AC is attached, the following paper sizes can be saddle folded: A3, B4, A4R, 12" x 18"(305 mm x 457 mm), 11" x 17"(279 x 432 mm), LGL, LTRR, or custom size (8 1/4" x 11" to 12" x 18" (210 mm x 279.4 mm to 304.8 mm x 457.2 mm)) |
Double Parallel Fold: | The A4R paper is folded outward 4 times. If you want the printed side to be folded inside, select [Up (Reverse Order)] for [Face Up/Face Down]. |
IMPORTANT |
If the machine automatically shuts down at the time specified in [Auto Shutdown Weekly Timer] while you are editing the job tickets, only those job tickets that have been processed up to the time when the machine shuts down are edited successfully. |