When the punch waste tray of the 2/4 Hole Puncher Unit-A or 4 Hole Puncher Unit-A becomes full, an animation screen prompting you to remove the punch waste appears on the touch panel display.
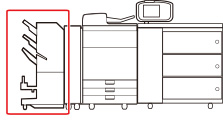
The location of the 2/4 Hole Puncher Unit-A or 4 Hole Puncher Unit-A is indicated in the following illustration.
Removing Punch Waste (2/4 Hole Puncher Unit-A/4 Hole Puncher Unit-A)
NOTE |
The 2/4 Hole Puncher Unit-A and 4 Hole Puncher Unit-A are optional products. The 2/4 Hole Puncher Unit-A/4 Hole Puncher Unit-A is available only when the Staple Finisher-AC or Booklet Finisher-AC is attached. |
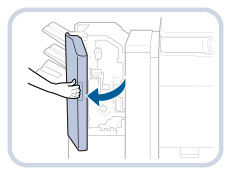
1.
Open the front cover of the finisher.
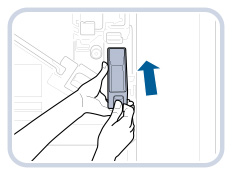
2.
Pull out the punch waste tray.
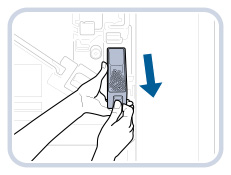 | 1. Hold the handle and pull it slowly towards you. |
2. When the punch waste tray is pulled out halfway, support it with the other hand and then pull it out all the way. |
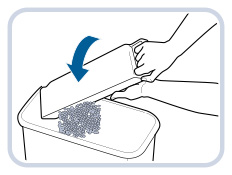
3.
Discard the punch waste.
NOTE |
Make sure that the punch waste tray is completely emptied. |
4.
Return the punch waste tray to its original position.
Be sure to push in the punch waste tray firmly until it is securely in place.
NOTE |
If the punch waste tray is not securely in place, you cannot make copies or prints in the Hole Punch mode. |
5.
Close the front cover of the finisher.
 CAUTION CAUTION |
When closing the cover, be careful not to get your fingers caught, as this may result in personal injury. |