Installing by Not Connecting This Printer to an Outside Network (Manual)
This section describes how to install the system options and MEAP applications without connecting the printer to an outside network.
Obtaining the License File
Obtain the license file.
License file: Obtain the license file when installing the system options/MEAP applications using the Remote UI.
|
NOTE
|
Preparing a license access number certificateMake sure that the license access number that is included with the package is available.
License access number is not printed on the package of the MEAP applicationIf the license access number is not printed on the package of the MEAP application you are using, the license file is issued by the distributor of the MEAP application. You do not need to obtain the license file explained in this section. For more information, see the manual for each MEAP application.
|
1
Check the management number you need to obtain the license file.
To obtain the license file, the following management number is required.
License Access Number: Check the license access number certificate.
Device Serial Number: You can check this number from the Utility menu of the operation panel.
"e-Manual"
2
Access http://www.canon.com/lms/license/.
3
Follow the instructions on the screen and obtain the license file.
Next, install the system options or the MEAP applications.
Installing the System Options Using the Remote UI
You can install the system options to the printer using the Remote UI.
1
Start the Remote UI, and then log in as Administrator.
"e-Manual"
2
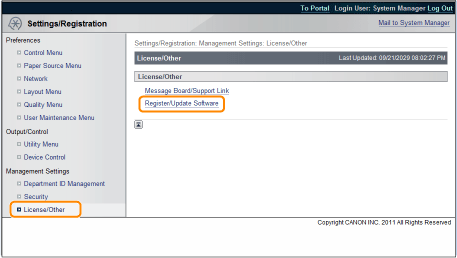
From the top page of the Remote UI, click [Settings/Registration] → [License/Other] → [Register/Update Software].
3
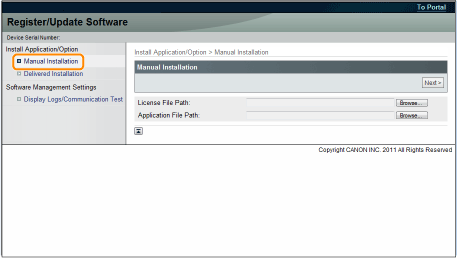
Click [Manual Installation].
4
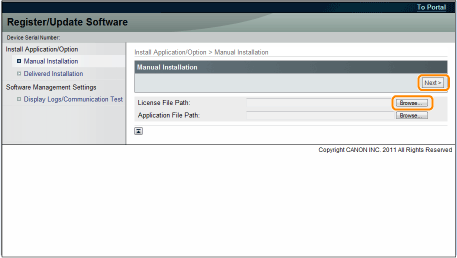
Click [Browse...] → select the license file to install → click [Next].
File extensions:
|
License File:
|
A file with the [lic] extension.
|
5
Check the contents that will be installed on the confirmation screen → click [Install].
Installing the MEAP Applications Using the Remote UI
You can install the MEAP applications to the printer using the Remote UI.
|
NOTE
|
The number of MEAP applications that can be installedYou can install up to eight applications.
For details on MEAP applicationsThere may be other system requirements for installation, depending on the MEAP applications. For instructions on settings, see the manual provided with the MEAP application.
|
1
Start the Remote UI, and then log in as Administrator.
"e-Manual"
2
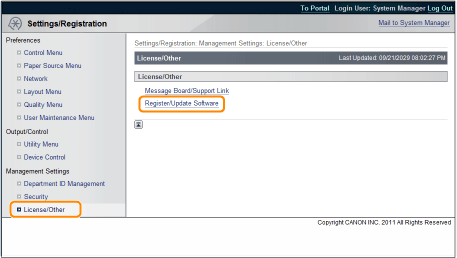
From the top page of the Remote UI, click [Settings/Registration] → [License/Other] → [Register/Update Software].
3
Click [Manual Installation].

4
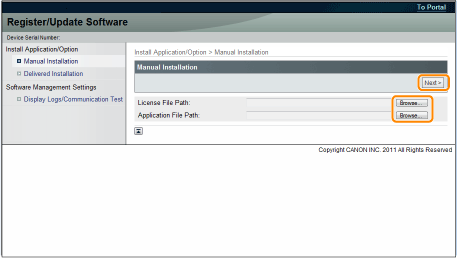
Click [Browse...] → select the license file and the application file to install → click [Next].
File extensions:
|
License File:
|
A file with the [lic] extension.
|
|
Application File:
|
A file with the [jar] extension.
|
|
IMPORTANT
|
When you install MEAP applicationsYou cannot install license files only.
When installing the MEAP application, make sure you specify the license file. You cannot install the MEAP application without specifying the license file.
|
5
Confirm the information displayed on the install confirmation page → click [Yes].
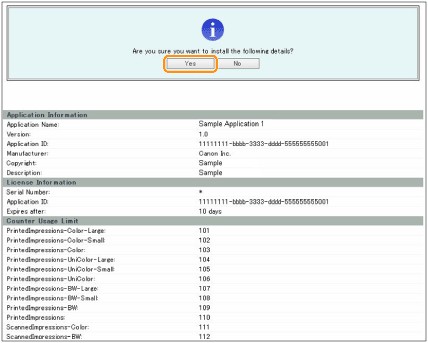
Depending on the MEAP application, a software license agreement screen may be displayed. Confirm the information displayed on the screen → click [OK].
If you are installing a new MEAP application, the following information is displayed on the screen.
Application Information
License Information
The following information is displayed when you overwrite a MEAP application.
Current Application Information
Application Information after Overwrite
Installation will start after the message <Installing... Please wait.> is displayed again. After the installation, click [To Manual Installation] to display the Manual Installation screen.
|
IMPORTANT
|
To use MEAP applicationsTo use the installed MEAP application, you must start the MEAP application.
|
Starting the MEAP Applications
This section describes how to start the installed MEAP application from the SMS screen.
|
NOTE
|
Details on SMSFor details on SMS, see "Function Guide for MEAP Application Management."
|
1
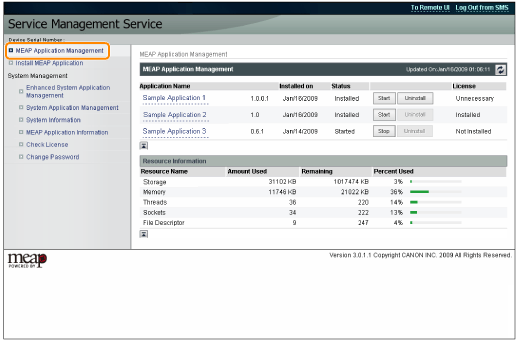
From the top page of the SMS, click [MEAP Application Management].
2
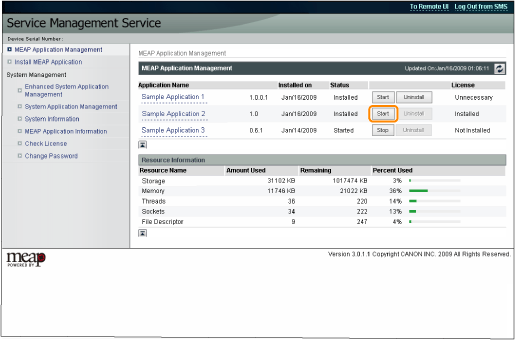
Select the application you want to start → click [Start].
