Fixing the Paper Size and Type To Use with the Multi-Purpose Tray
You can register default paper settings for the multi-purpose tray. Registering default settings can save yourself the effort of having to specify the settings each time you load the same paper into the multi-purpose tray.
 |
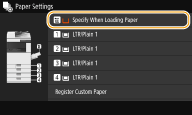
After the default paper setting is registered, the paper setting screen is not displayed when paper is loaded, and the same setting is always used. If you load a different paper size or type without changing the paper settings, the machine may not print properly. To avoid this problem, select <Specify When Loading Paper> in step 3, and then load the paper. |
1
Select <Paper Settings> in the Home screen. Home Screen
2
Select multi-purpose tray.
3
Select the paper size.
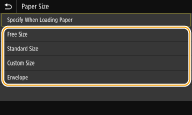
 When loading standard size paper
1 | Select <Standard Size>. |
2 | Select the paper size in the <Frequently Used Sizes> tab. If the loaded paper size is not displayed, select <Other Sizes> tab. 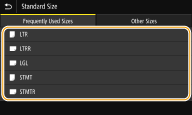 |

When loading LTR or STMT size paper
In the landscape orientation, select <LTR> or <STMT>. In the portrait orientation, select <LTRR> or <STMTR>.
 When loading custom size paper
1 | Select <Custom Size>.  You can specify the paper size as <Free Size>, which eliminates the need to enter the paper size setting. Specify <Free Size> when you load paper of unknown size to use for copying or when the paper size is already registered in the printer driver. |
2 | Specify the length of the <X> side and <Y> side. Select <X> or <Y>, and enter the length of each side using <+>/<->, with  / / to move the cursor between the digits for inputting whole numbers and fractions. to move the cursor between the digits for inputting whole numbers and fractions.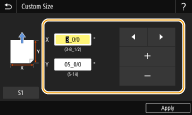  If you register the paper size you use frequently on buttons <S1> to <S3>, you can call them up with one touch. Registering a Custom Paper Size |
3 | Select <Apply>. |
 When loading envelope
1 | Select <Envelope>. |
2 | Select the orientation and type of envelopes. 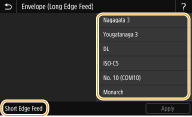 If you changed the placement of the envelopes, select <Short Edge Feed> or <Long Edge Feed>, and select the envelope type. If you selected vertical placement for Nagagata 3, select <Next>, and specify the flap length.  When using Kakugata 2, place it horizontally. |
3 | Select <Apply>. |
4
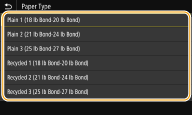
Select paper type.
