Specifying Paper Size and Type in the Multi-Purpose Tray
The screen shown here is displayed when paper is loaded in the multi-purpose tray. Follow the on-screen instructions to specify settings that match the size and type of the loaded paper.

 |
Paper settings on the machineIf <Prioritize Driver Settings When Printing> is set to <On>, printer driver settings are prioritized when the multi-purpose tray is specified as the paper source for jobs from the printer driver. <Prioritize Driver Settings When Printing> If the screen shown above is not displayed when paper is loadedIf you always load the same paper in the multi-purpose tray, you can skip the paper setting operations by registering the paper size and type as the default setting. When the default setting is registered, however, the screen shown above is not displayed. To display the screen, select <Specify When Loading Paper> (Fixing the Paper Size and Type To Use with the Multi-Purpose Tray). When only changing the paper typeFollow step 2 and the following steps. |
1
Select the paper size.


By registering "Favorite Paper", the registered paper settings can be easily recalled from <Favorite Paper>. Registering Favorite Paper Size and Type for the Multi-Purpose Tray
 When loading standard size paper
1 | Select <Standard Size>. |
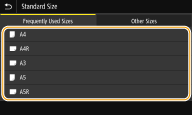
2 | Select the paper size in the <Frequently Used Sizes> tab. If the loaded paper size is not displayed, select <Other Sizes> tab.  |
When loading A4 or A5 size paper
In the landscape orientation, select <A4> or <A5>. In the portrait orientation, select <A4R> or <A5R>.
 When loading custom size paper
1 | Select <Custom Size>.  You can specify the paper size as <Free Size>, which eliminates the need to enter the paper size setting. Specify <Free Size> when you load paper of unknown size to use for copying or when the paper size is already registered in the printer driver. |
2 | Specify the length of the <X> side and <Y> side. Select <X> or <Y>, and enter the length of each side using the numeric keys.   If you register the paper size you use frequently on buttons <S1> to <S3>, you can call them up with one touch. Registering a Custom Paper Size |
3 | Select <Apply>. |
 When loading envelope
1 | Select <Envelope>. |
2 | Select the orientation and type of envelopes.  If you changed the placement of the envelopes, select <Short Edge Feed> or <Long Edge Feed>, and select the envelope type. If you selected vertical placement for Nagagata 3, select <Next>, and specify the flap length.  When using Kakugata 2, place it horizontally. |
3 | Select <Apply>. |
2
Select <Change Ppr. Type>.

3
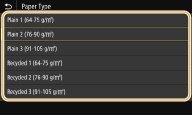
Select paper type.

4
Select <Apply>.