
Inner Finisher-H/Inner 2/3 Hole Puncher-B
Installing "Inner Finisher-H" enables you to use the following finish functions.
Collate
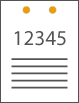
The printouts are collated into sets arranged in page order of the original.
Group
All printouts of the same original page are grouped together into sets.
Offset
Each printout group is shifted in alternating layers.
Staple + Collate
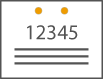
The printouts are collated into sets arranged in page order and stapled (Corner/Double).
Staple + Group
All printouts of the same original page are grouped together into sets and stapled (Corner/Double).
Staple Free
The printouts are crimped and bound without using a staple. You can easily split the paper by pressing the crimped part with your fingers. This function is useful for saving staples and also binding printouts briefly.
The printouts are collated into sets arranged in page order of the original.
Group
All printouts of the same original page are grouped together into sets.
Offset
Each printout group is shifted in alternating layers.
Staple + Collate
The printouts are collated into sets arranged in page order and stapled (Corner/Double).
Staple + Group
All printouts of the same original page are grouped together into sets and stapled (Corner/Double).
Staple Free
The printouts are crimped and bound without using a staple. You can easily split the paper by pressing the crimped part with your fingers. This function is useful for saving staples and also binding printouts briefly.
|
For information on the paper sizes that can be used for Staple Free, see Inner Finisher-H. For information on the functions or paper that cannot be used with Staple Free, see "Restrictions on Combinations of Copy Functions" or Paper Not Available for Finishing. The following are unavailable depending on the staple position. Paper not available for two-sided printing Mixed paper sizes Depending on the usage environment and paper type, the crimped part may be split easily. |
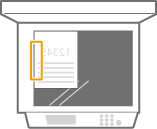
Manual Stapling
You can manually staple printed paper by inserting paper in the slit. As an example of use, you can remove staples bound to the document, copy or scan it, and then staple the document again.
You can manually staple printed paper by inserting paper in the slit. As an example of use, you can remove staples bound to the document, copy or scan it, and then staple the document again.
TIPS |
If you install the "Inner 2/3 Hole Puncher-B" in the "Inner Finisher-H," you can punch holes in your printouts. |
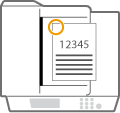
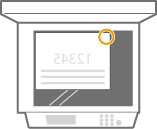
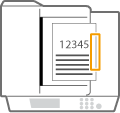
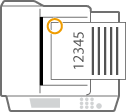
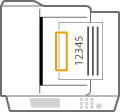
External View
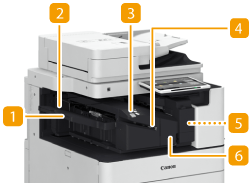
 Auxiliary Tray
Pull out the auxiliary tray if you are outputting large size paper.
 Output Tray
Paper is output to the output tray.
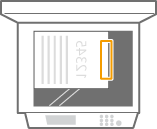
 Staple Button
Press this button when you manually staple paper (Manual Stapling). You can also staple paper without pressing the button. You can specify the time period for the paper to be stapled after inserting the paper. <Adjust Action>  <Time Until Stapling Starts in Stapler Mode>
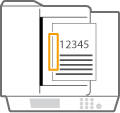
 Slit
Slit
Insert paper to manually staple the paper. You can specify the time period for the paper to be stapled after inserting the paper.
 Punch waste tray (Inner 2/3 Hole Puncher-B)
Pull out to discard punch waste. Emptying the Punch Waste (Optional)
 Front cover
Open to remove jammed paper, clear a staple jam in the stapler unit, or replace the staple cartridge.
Selecting the Staple Position
To finish with the stapler, you need to select the staple position paying attention to the orientation of original document.
|
For the procedure to finish with the stapler, see Finishing with the Stapler |
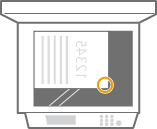
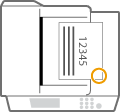
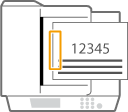
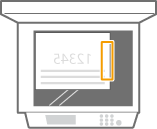
 Stapling at One Location in a Corner of the Paper (Corner)
Refer to the following figures to select the staple position.
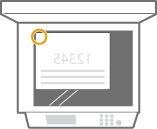
Stapling at the top right of paper in portrait orientation
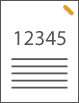
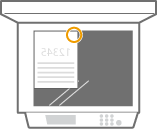
When Placing LTR-, A4-, A5-size Originals
Feeder | Platen glass | ||
 |  |
select <Top Right>
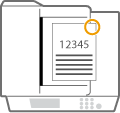
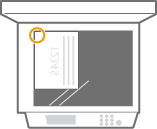
When Placing 11" x 17"-, LGL-, A3-size Originals
Feeder | Platen glass | ||
 |  |
select <Top Left>
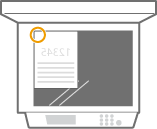
Stapling at the top left of paper in portrait orientation
When Placing LTR-, A4-, A5-size Originals
Feeder | Platen glass | ||
 |  |
select <Top Left>
When Placing 11" x 17"-, LGL-, A3-size Originals
Feeder | Platen glass | ||
 |  |
select <Bottom Left>
Stapling at the top right of paper in landscape orientation

When Placing LTR-, A4-, A5-size Originals
Feeder | Platen glass | ||
 |  |
select <Bottom Right>
When Placing 11" x 17"-, LGL-, A3-size Originals
Feeder | Platen glass | ||
 |  |
select <Top Right>
Stapling at the top left of paper in landscape orientation
When Placing LTR-, A4-, A5-size Originals
Feeder | Platen glass | ||
 |  |
select <Top Right>
When Placing 11" x 17"-, LGL-, A3-size Originals
Feeder | Platen glass | ||
 |  |
select <Top Left>
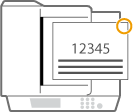
Stapling at Two Locations in a Margin Area of the Paper (Double)
Refer to the following figures to select the staple position.
Stapling in the top margin area of paper in portrait orientation
When Placing 11" x 17"-, LGL-, A3-size Originals
Feeder | Platen glass | ||
 |  |
select <Left>
Stapling in the left margin area of paper in portrait orientation

When Placing LTR-, A4-, A5-size Originals
Feeder | Platen glass | ||
 |  |
select <Left>
Stapling in the right margin area of paper in portrait orientation

When Placing LTR-, A4-, A5-size Originals
Feeder | Platen glass | ||
 |  |
select <Right>
Stapling at the left margin area of paper in landscape orientation
When Placing 11" x 17"-, LGL-, A3-size Originals
Feeder | Platen glass | ||
 |  |
select <Left>
Stapling in the right margin area of paper in landscape orientation
Feeder | Platen glass | ||
 |  |
select <Right>
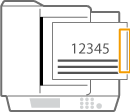
Binding the Paper by Crimping without Using Staples (Corner)
Refer to the following figures to select the crimp position when crimping the paper without using staples.
Stapling at the top right of paper in portrait orientation
When Placing LTR-, A4-, A5-size Originals
Feeder | Platen glass | ||
| |
select <Top Right>
When Placing 11" x 17"-, LGL-, A3-size Originals
Feeder | Platen glass | ||
 |  |
select <Top Left>
Stapling at the top left of paper in portrait orientation
When Placing LTR-, A4-, A5-size Originals
Feeder | Platen glass | ||
| |
select <Top Left>
When Placing 11" x 17"-, LGL-, A3-size Originals
Feeder | Platen glass | ||
| |
select <Bottom Left>
Stapling at the top right of paper in landscape orientation
When Placing LTR-, A4-, A5-size Originals
Feeder | Platen glass | ||
| |
select <Bottom Right>
When Placing 11" x 17"-, LGL-, A3-size Originals
Feeder | Platen glass | ||
| |
select <Top Right>
Stapling at the top left of paper in landscape orientation
When Placing LTR-, A4-, A5-size Originals
Feeder | Platen glass | ||
| |
select <Top Right>
When Placing 11" x 17"-, LGL-, A3-size Originals
Feeder | Platen glass | ||
| |
select <Top Left>
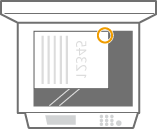
Manual Stapling
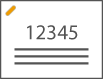
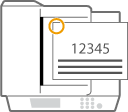
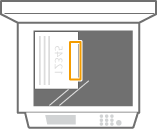
1 | Place the desired bundle of paper into the slit in the inner finisher. Insert the corner of the paper bundle where you want it stapled straight into the slit, with the front side of the paper facing down. When the paper bundle is sensed, the staple button starts to blink and automatic stapling is performed. 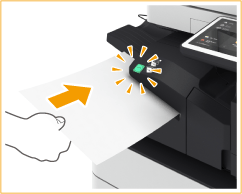  You can set the time in seconds to elapse before stapling is executed. <Time Until Stapling Starts in Stapler Mode> You can perform stapling without waiting for the specified stapling start time to come. While holding the paper bundle with one of your hands, use the other hand to press the staple button. 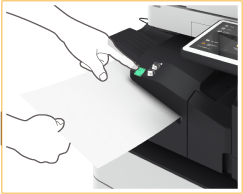 |
2 | Pull out the paper bundle. Wait for the staple button to turn off, and then pull out the paper bundle. |
 |
You cannot perform manual stapling while outputting of printed paper continues. |
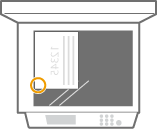
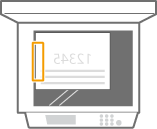
Making Punch Holes
Refer to the following figures to place the original so that punch holes are made at the desired positions.
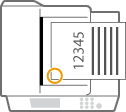
Making punch holes in the left margin area of paper in portrait orientation

When Placing LTR-, A4-, A5-size Originals
Feeder | Platen glass | ||
| |
Making punch holes in the top margin area of paper in portrait orientation
Feeder | Platen glass | ||
| |
Making punch holes in the left margin area of paper in landscape orientation

Feeder | Platen glass | ||
| |
Making punch holes in the top margin area of paper in landscape orientation
When Placing LTR-, A4-, A5-size Originals
Feeder | Platen glass | ||
 |  |
|
For information on the paper sizes that can be used for Staple and Hole Punch, see Inner Finisher-H. To replace the staple cartridge of the stapler unit, see Loading Staples (Optional). For how to clear a paper jam or a staple jam, see Clearing Paper Jams and Clearing Staple Jams (Optional). The maximum number of bindable sheets may not be possible, depending on the paper type. In this case, change the paper type, or reduce the number of sheets to bind. Collate and groupIf you select <Offset> in combination with the collate or group function, each printout group is shifted. StaplersWhen you are using the Staple mode, do not remove the stack of paper from the output tray during the job. Remove the stack of paper when the job has been completed. If the <Load staples into the stapler unit.> message appears, almost all of the staples have been used. To proceed, replace the staple cartridge. Output temporarily stops when the tray reaches the lowest position or when 30 sets have been stapled. Printing resumes when you remove all of the paper that has been output. |