Adjusting Print Position
If a document is printed off-center or out of the printable range, adjust the print position. You can adjust the print position for each paper source. You can adjust the print position in the range -0.20" to +0.20" (-5.0 mm to +5.0 mm) in increments of 0.01" (0.1 mm).

Checking the Direction and Distance to Adjust
When you adjust the print position, specify the direction using "+" and "-" and the distance using "mm." For <Adjust Vertically (Front Side)>/<Adjust Vertically (Back Side)>, specify a value with a "+" sign to shift the print position in the up-to-down direction. For <Adjust Horizontally (Front Side)>/<Adjust Horizontally (Back Side)>, specify a value with a "+" sign to shift the print position in the left-to-right direction. To shift in the reverse direction, specify a value with a "-" sign.
<Adjust Vertically (Front Side)>/<Adjust Vertically (Back Side)>  | <Adjust Horizontally (Front Side)>/<Adjust Horizontally (Back Side)>  |
1
Select <Menu> in the Home screen. Home Screen
2
Select <Adjustment/Maintenance>  <Adjust Image Quality>.
 <Adjust Image Quality>.
3
Select <Adjust Print Position>.
4
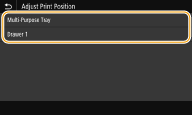
Select the paper source.
When the optional cassette feeding module is installed, its paper drawer is also displayed.

5
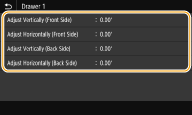
Select the combination of adjustment direction and printing side.

6
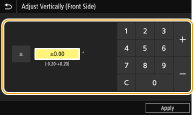
Set an adjustment value.

7
Select <Apply>.
Adjusting the Print Position for All Print Jobs |
You can use <Function Settings> in the setting menu of the operation panel to adjust the print position for all print jobs, irrespective of the paper source. The print position can be adjusted in 0.01" (0.5 mm) increments between -2.00" (-50.0 mm) and +2.00" (+50.0 mm). <Offset Short Edge/Offset Long Edge> |