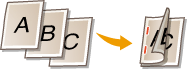
Finishing with the Stapler
 | You can bind each copy with the stapler after a collate or group output. |
1
Place the original. Placing Originals
2
Press <Copy>. <Home> Screen
3
Press <Options> on the Copy Basic Features screen. Copy Basic Features Screen
4
Press <Finishing>.
5
Press <Staple + Collate> or <Staple + Group>  <Next>.

<Staple> is displayed only when you are printing a PDF file with <Access Stored Files>.
6
Select how to staple.
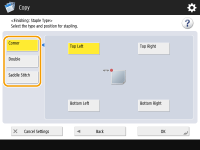
To staple in one location in the corner of the page, select <Corner> for the staple position.

To staple in two locations in the side of the page, select <Double> for the staple position.
To staple in the section where the paper is folded in half, select <Saddle Stitch>. Depending on the option, you can attach a cover or change the folding position. When trimming the edges of the output sheets, you can adjust the trimming position.

Depending on the option, you can bind the paper by crimping without using staples. Select <Staple-Free> and specify the binding position. This is convenient for when you want to save staples or temporarily bind the paper, as you can easily tear off the paper by rubbing the crimped part.
7
Press <OK> <Close>.
8
Press  (Start).
(Start).Copying starts.
 |
Depending on finishing functions, the installation of optional devices is needed. Optional Equipment Depending on the paper type, you cannot use finishing functions. Hardware Specifications You can specify the procedure to perform when there are too many sheets to staple at once. <Action When Too Many Sheets to Staple> <Saddle Stitch> can be set only if 2-Sided Copying is set. When configuring settings in <Access Stored Files>The finishing function can be used only when you are printing a PDF/XPS file or a file stored in the Mail Box. |