 (Settings/Register)
 <Adjust Image Quality>
This section describes how to adjust image quality for copying and printing.
<Auto Adjust Gradation>
(Settings/Register) If the gradation of the printing is significantly different from the original document, this correction adjusts the printing so that it more closely matches the original document. Adjusting Gradation
 |
It is recommended that you select <Full Adjust> when performing an automatic gradation adjustment. Select <Quick Adjust> for a quick, but less complete adjustment between regular full adjustment recalibrations. |
 |
Test pages are not counted as part of the copy or print total page counts. |
<Correct Density>
(Settings/Register) If the density of the printing is significantly different from the original document, this adjusts the scan density to be closer to the original. Adjusting Density
<Auto Correct Color Shift>
(Settings/Register) If the colors of printing run or blur, color mismatch (color misregistration) may have occurred. This correction adjusts the printing so that color mismatch does not occur. Correcting Color Mismatch
<Settings for Auto Full Calibration>
(Settings/Register) The machine performs automatic adjustment (calibration) in order to prevent color misregistration and ensure that the original color intensity is correctly reproduced. You can set the timing and frequency for performing calibration. Automatically Adjusting Color Registration and Color Intensity
<Full Color Printing Vividness Settings>
(Settings/Register) This setting enables you to make colors more saturated when performing color printing. Making Colors More Vivid
|
This setting is only effective for copying. Changes in settings are effective after performing <Apply Setting Changes>. |
<Fine Adjust Zoom>
(Settings/Register) If the size of the image copied is significantly different from the original document, fine adjustment is performed so that the printing more closely matches the size of the original document. Adjusting Image Size
<Adjust Toner Volume Used for Color Printing>
(Settings/Register) By adjusting the amount of toner used when color printing, you may be able to reduce problems such as streaks and irregularities. Reducing Toner Used When Color Printing
<Waterdrop Pattern Prevention Mode>
(Settings/Register) You can set <Waterdrop Pattern Prevention Mode> for when a splattered image, white patches, streaks, etc. appear on the halftone images of twosided print jobs. Immediately after you turn ON the machine in a low temperature environment, if the halftone reproduction of the printout becomes significantly different from the original document, set this mode to <On>.
|
If you set <Waterdrop Pattern Prevention Mode>, the printing speed for the first sheet becomes slower. |
<Adjust Fixing Temperature>
(Settings/Register) You can reduce image quality problems that occur due to an inappropriate fixing unit temperature by adjusting the fixing temperature.
|
Set this in the following cases. The print results may be improved. <Low>: Set this when the same unintended image is repeated, as indicated below. 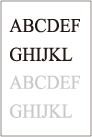 <High 1>: Set this when the toner of the printed images peels off. <High 2>: Set this when the improvements of <High 1> are insufficient. Set <Standard> to not use either setting. The printing speed is slower when <High 2> is set. Toner peeling may be able to be improved without changing this setting, by changing the paper type and usage environment. |
<Curl Prevention Mode>
(Settings/Register) You can set <Curl Prevention Mode> to reduce curling on the end of paper due to the heat and pressure of the fixing unit during printing.
|
If this setting is set to <On>, it may affect the printing quality. If setting <Mode 1> to <On> does not reduce curling, set <Mode 2> to <On>. If setting both <Mode 1> and <Mode 2> does not reduce curling, set <Mode 1> and <Mode 2> to <Off> and set <Switch Paper Feed Method> to <Print Side Priority>. |
<Paper Slipping Prevention Mode>
(Settings/Register) Paper may not be fed correctly when printing or print quality may be reduced, depending on the usage environment.
|
<Mode 1> : Set this when printing documents with large amounts of images or text on each page. However, the print speed will be slower. <Mode 2> : Set this when printing documents with small amounts of images or text on each page. The print speed will not be reduced as much as <Mode 1>. <Off>: Set this when you do not want the print speed to be reduced. However, the print quality will not be improved. |
<Auto Clean Secondary Transfer Roller>
(Settings/Register) The secondary transfer roller is cleaned after executing a print job with free size specified. Set this when the back side of the paper is dirty.
<White Streak Prevention Mode>
(Settings/Register) White streaks may appear in the printed image. This setting may improve this problem.
|
When set to <On>, the print density will be lighter. |
<Correct Fixing When Using Plain Paper>
(Settings/Register) Smudges may appear in the printed image, depending on the paper type and usage environment. This setting may improve this problem.
|
When set to <On>, the print speed will be slower. |
<Correct Tail End Fixing When Using Plain Paper>
(Settings/Register) Colors may become darker at the tail end of printed images because toner is insufficiently fixed. This setting may improve this problem.
|
When set to <On>, the print speed will be slower. |
<Plain Paper Fill Area Image Adjustment Mode>
(Settings/Register) The finish quality may be able to be improved by enabling this setting when using plain paper with a smooth surface.
|
If you set this setting to <On> when using plain paper without a smooth surface, fixing problems may occur. |
<Heavy Paper Fill Area Image Adjustment Mode>
(Settings/Register) The finish quality may be able to be improved by enabling this setting when using heavy paper without a smooth surface.
|
If you set this setting to <On> when using paper with a smooth surface, fixing problems may occur. |
<Envelope Sealing Prevention Mode>
(Settings/Register) You can set <Envelope Sealing Prevention Mode> to prevent the glue on envelope flaps from melting and sealing due to the heat and pressure of the fixing unit during envelope printing.
|
This setting is only enabled during envelope printing. If this setting is set to <On>, the quality of the image may be adversely affected. |