Cleaning the Dust-Proof Glass
When white streaks or other print defects occur even after cleaning the platen glass, feeder, and main unit, the dust-proof glass may be dirty. In this case, follow the procedure below to clean the dust-proof glass.
1
Turn the power OFF, and remove the power plug from the power outlet.

Check the operation status of the machine before turning the power OFF. You can turn the power OFF even if the machine is executing an operation, but this may cause the operation to be interrupted or data to become damaged.
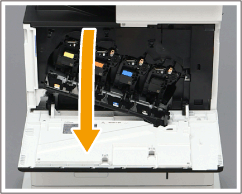
2
Open the front cover.
3
Pull out the toner cartridge.
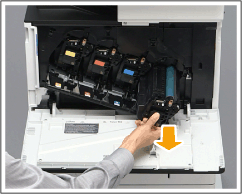
Make sure to avoid applying shocks to the toner cartridge by hitting it against something, etc. Doing so may cause the toner to leak.
4
Insert the removed toner cartridge back into place.
Before installing the toner cartridge, confirm that the color of the toner cartridge and the color indicated on the slot of the main unit are the same.
Hold the toner cartridge the arrow marked side up, and slide it into the main unit until it will not go any further.
Place the toner cartridge on the toner cartridge guide ( ) and push the cartridge in until it cannot go any further.
) and push the cartridge in until it cannot go any further.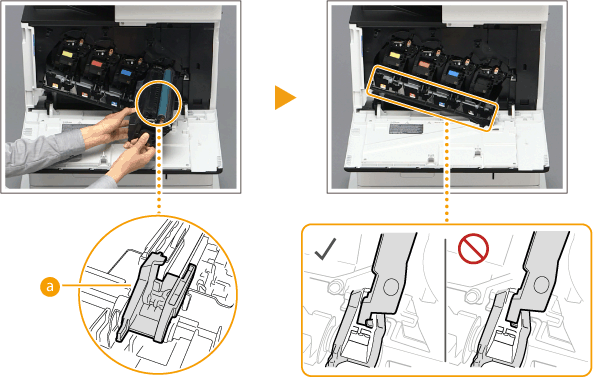
For the other three toner cartridges, repeat steps 3 and 4.
5
Close the front cover.
6
Insert the power plug into the power outlet, and turn the power ON.