
Clearing Paper Jams
When a paper jam occurs, a message appears on the control panel. Follow the procedure described below to remove jammed paper.
|
When all paper jams have been cleared, immediately remove your hands from the machine and optional equipment so that your clothing and hands do not get caught in the rollers. |
 |
Cautions when clearing paper jams When the paper gets torn, be sure to remove all of it so that no pieces remain. Do not forcibly remove the jammed paper from the machine. Forcibly removing the paper may damage parts of the machine. If you cannot remove the paper, contact your local authorized Canon dealer. |
For jobs where paper is fed to the next unit
Jobs with automatic adjustment
Regular jobs (without adjustment)
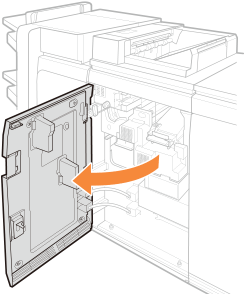
1
Open the front cover of the Sensing Unit-A.
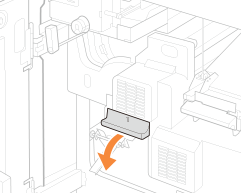
2
Lower the handle of the V-A1 guide and open the guide.
3
Lower the handle of the V-A2 guide and open the guide.
4
Remove any paper left inside the V-A1 and V-A2 guides.
5
Raise the handle of the V-A2 guide and close the guide.
6
Raise the handle of the V-A1 guide and close the guide.
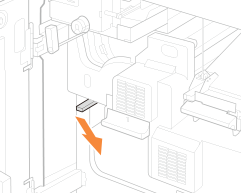
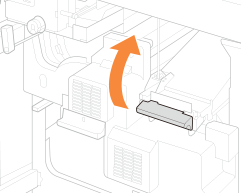
7
Raise the handle of the V-A3 guide and open the guide.
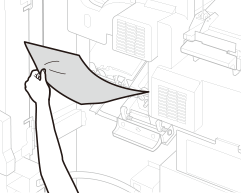
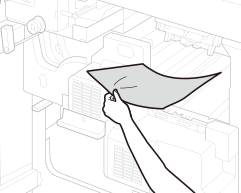
8
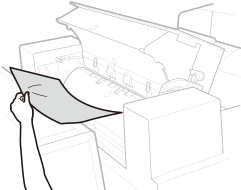
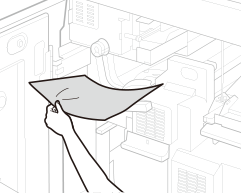
Remove any jammed paper.
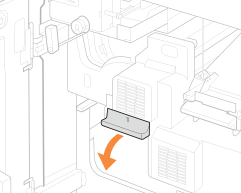
9
Lower the handle of the V-A3 guide and close the guide.
10
Close the front cover of the Sensing Unit-A.
For jobs where paper is output to the output tray
Jobs where automatic adjustment is performed by printing test pages
Shading correction
Adjustment of the secondary transfer voltage
 |
For instructions related to formats smaller than B5, refer to For jobs where paper is fed to the next unit |
1
Open the front cover of the Sensing Unit-A.
2
Lower the handle of the V-A2 guide and open the guide.
3
Remove any jammed paper.
4
Raise the handle of the V-A2 guide and close the guide.
5
Raise the handle of the V-A3 guide and open the guide.
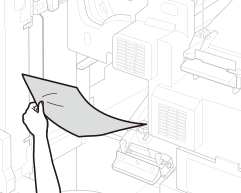
6
Remove any jammed paper.
7
Lower the handle of the V-A3 guide and close the guide.
8
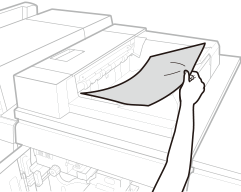
Remove any paper left in the output area.
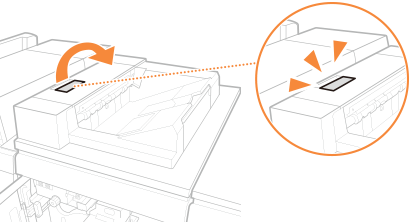
9
Pull the lever of the paper output feed guide to open the cover.
10
Remove any paper left inside V-B1.
11
Close the cover of the paper output feed guide.
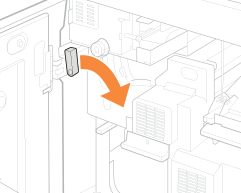
12
Push the lever of the V-B2 guide to the right and open the guide.
13
Turn the V-B3 knob to the right and move the paper into the guide.

14
Remove the paper.
15
Push the lever of the V-B2 guide to the left and close the guide.
16
Close the front cover of the Sensing Unit-A.